Nearly a year ago I wrote a carefully worded open letter to The Pioneer Woman after outgrowing her blog & finding others that were more interesting and/or relevant to our lifestyle. A blog that is single-mindedly devoted to disliking her picked it up & linked to it. To be honest, I don't even read that blog because I found that it could be really mean-spirited at times.
As a result of being linked from that other blog, my one post about the Pioneer Woman gets more hits & comments than all my others combined. Some comments are supportive of my post, whose point was that I no longer found her relevant to my life and was moving on to blogs written by people I could identify with, while some comments are downright nasty.
The irony is that people have to go looking for the post to find it. My blog isn't exactly set up with SEO terms, nor is it in the top 100 search results.
Lately some of the negative comments have gotten ugly and personal. Commenters, many of them anonymous, have called me catty, jealous, insecure, a bully, a "hater", and more. Most of the time I just roll my eyes and wonder if they actually even read the damn post.
Today I went back and read it. I hadn't revisited it for quite a while. A year later, I still agree with what I wrote. I also believe that my opinion was carefully written without making any low blows at a fellow blogger.
Just this past weekend someone called me mean & accused my children of being bullies... how ironic given that the opening paragraph clearly stated I was childless. That commenter had on her personal profile that she works in education. I'm guessing that she didn't read my post, her reading comprehension must not be very high, or that she was so angry by the time she started reading that she could do little more than skim it.
Truth be told, the snarky, bitchy comments get to me sometimes. All comments are sent to my in-box, which helps me monitor them, and this morning I got a handful of Monday morning notifications about what a meanie head I am. It was (sarcasm) an awesome way to start my work week.
I'm debating taking the post down. I try hard to never "feed the trolls". I've allowed all the negative comments to remain on the thread and have never responded. Blogs are free speech both for me as the blogger, and for you as the reader, n'est-ce pas?
Maybe I should ask that other blog to remove the link from their site.
Maybe I should expound upon the caveat at the opening of the post (which starts "fans of the Pioneer Woman should stop reading now").
What advice do you have?
Monday, October 17, 2011


Saturday, October 15, 2011
Beans, the magical fruit
I got some crummy news last month: I have gestational diabetes. Before I got pregnant I'd been working on losing weight to reduce my risk: both of my parents and one of my grandparents are diabetics. Being over 35 while pregnant is another risk factor, though not one I could change.
While I initially took the diagnosis in stride, the past few weeks have been tough as I learn which foods spike my blood sugar and which don't. Frustratingly, even whole wheat breads, fruit, and sugar in any form are out. Forget the sterotype of the pregnant woman chowing down on ice cream: I'm lucky if I get a sugar-free fudgesicle. On the bright side, I haven't gained a pound in 2 months!
Meat, nuts, cheese, and vegetables are all in. I feel like I'm on South Beach or Atkins. I met with a dietician to explore meal options and determine how I can best control my blood sugar levels in order to keep both baby and me in good health for the next 3 months. I suspect that she learned more from me about sustainable foods than I learned from her about meal plans. What a waste of a $30 co-pay.
By the way, have I told you it's a boy? We're not telling his first name until he's here but I can say it is unusual and starts with "K". He'll have my last name as his middle name, and share Gene's last name. The baby - we've been calling him "Bean" - is due 2 months from today! I feel like I've been pregnant forever.
Anyway, as I've been researching various diabetic-friendly foods and recipes I found that many of them contain beans. Beans are a very healthy choice for people living with diabetes.
Dried beans are a staple in my pantry but canned beans are a rarity. The problem this creates is that I either have to make a special trip to the store or remember to soak my beans the night before I plan to use them. This doesn't work in a spontaneous kitchen!
My solution was to can some dried beans. I'd been meaning to do this for a while anyway and just had never gotten around to it. I looked up instructions and found them on one of my favorite canning how-to websites, www.pickyourown.org. I did some kidney beans and some black beans.
Why can your own beans?
In addition to canning the beans today, I made a batch of hummus. Making my own hummus allows me to control the ingredients, especially the salt. Here's the recipe I used. It's simple and you can customize the flavors easily. Add basil and pine nuts, sun-dried tomatoes, or roasted bell peppers for variation.
Total cost was about $2.50. I did use canned beans to make the hummus. Did you know they are cheaper in the Hispanic foods aisle than in the canned beans aisle? Go figure. Dried garbanzo beans are pricey around here: the only ones I can find are either Bob's Red Mill or from the farmers market.
While I initially took the diagnosis in stride, the past few weeks have been tough as I learn which foods spike my blood sugar and which don't. Frustratingly, even whole wheat breads, fruit, and sugar in any form are out. Forget the sterotype of the pregnant woman chowing down on ice cream: I'm lucky if I get a sugar-free fudgesicle. On the bright side, I haven't gained a pound in 2 months!
Meat, nuts, cheese, and vegetables are all in. I feel like I'm on South Beach or Atkins. I met with a dietician to explore meal options and determine how I can best control my blood sugar levels in order to keep both baby and me in good health for the next 3 months. I suspect that she learned more from me about sustainable foods than I learned from her about meal plans. What a waste of a $30 co-pay.
By the way, have I told you it's a boy? We're not telling his first name until he's here but I can say it is unusual and starts with "K". He'll have my last name as his middle name, and share Gene's last name. The baby - we've been calling him "Bean" - is due 2 months from today! I feel like I've been pregnant forever.
Anyway, as I've been researching various diabetic-friendly foods and recipes I found that many of them contain beans. Beans are a very healthy choice for people living with diabetes.
Dried beans are a staple in my pantry but canned beans are a rarity. The problem this creates is that I either have to make a special trip to the store or remember to soak my beans the night before I plan to use them. This doesn't work in a spontaneous kitchen!
My solution was to can some dried beans. I'd been meaning to do this for a while anyway and just had never gotten around to it. I looked up instructions and found them on one of my favorite canning how-to websites, www.pickyourown.org. I did some kidney beans and some black beans.
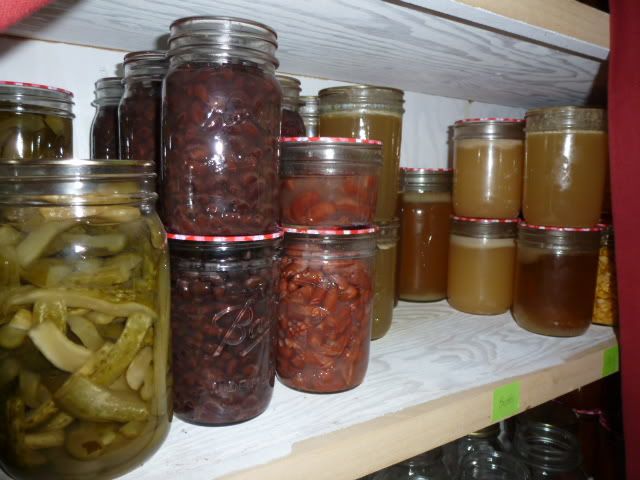 |
| A shelf from my canning pantry: pickles, black beans, kidney beans, stocks, & corn |
- It's shockingly economical. A one-pound bag of dried beans cost me $1.19 and generated about 4.5 pints of canned beans. The equivalent amount of generic canned beans costs at least $0.69 per pint, and $1/pint or more for name brands. In all I canned 18 pints of beans for about $4.
- It's stunningly easy. If you have a pressure canner, this is about the easiest thing you can stuff into a jar and preserve: no peeling, no coring, no dicing, no measuring, and minimal preparation.
- It's a time-saver. I don't have to soak or pre-cook any more beans. I just pop open a jar and VOILA: ready-to-eat beans.
- The cats don't come running when I open a home-canned jar. They twirl around my feet incessantly any time they hear the can-opener.
- Reduced exposure to bisphenol A. While there is BPA in the lining of standard Ball canning lids, the food in the jars is not in direct contact with the lids that way it is in a steel can from the manufacturer. Tattler lids are BPA-free but I've yet to make the transition to them.
In addition to canning the beans today, I made a batch of hummus. Making my own hummus allows me to control the ingredients, especially the salt. Here's the recipe I used. It's simple and you can customize the flavors easily. Add basil and pine nuts, sun-dried tomatoes, or roasted bell peppers for variation.
Total cost was about $2.50. I did use canned beans to make the hummus. Did you know they are cheaper in the Hispanic foods aisle than in the canned beans aisle? Go figure. Dried garbanzo beans are pricey around here: the only ones I can find are either Bob's Red Mill or from the farmers market.
Friday, September 23, 2011
Things I've learned from canning tomatoes
1. If Gene takes the camera to work, I won't see it again for at least a week.
2. Rosemary loves to clean up the tomato squirts.
3. It takes 2 minutes in boiling water to get the skin on 4 tomatoes perfect for peeling.
4. It takes me 2 minutes to peel and core 4 tomatoes.
5. Pull the tomatoes from the boiling water with a ladle in your right hand. Grab the hot tomato with your left hand using a dishwashing glove to protect from the heat. Take 2 steps backwards across the kitchen to drop the hot tomato into the cold water in the sink. It's an inelegant but efficient dance.
6. Canning whole tomatoes in their own juice works great for me. I literally stuff them into a jar and squish the bejeebies out of them to get as many as possible in a single jar.
7. My hand will fit into a widemouth jar but not a regular one.
8. My hand won't fit into my mouth. Ergo, my mouth is smaller than a widemouth jar opening.


2. Rosemary loves to clean up the tomato squirts.
3. It takes 2 minutes in boiling water to get the skin on 4 tomatoes perfect for peeling.
4. It takes me 2 minutes to peel and core 4 tomatoes.
5. Pull the tomatoes from the boiling water with a ladle in your right hand. Grab the hot tomato with your left hand using a dishwashing glove to protect from the heat. Take 2 steps backwards across the kitchen to drop the hot tomato into the cold water in the sink. It's an inelegant but efficient dance.
6. Canning whole tomatoes in their own juice works great for me. I literally stuff them into a jar and squish the bejeebies out of them to get as many as possible in a single jar.
7. My hand will fit into a widemouth jar but not a regular one.
8. My hand won't fit into my mouth. Ergo, my mouth is smaller than a widemouth jar opening.

9. It's possible to learn how to can tomatoes from the internet. That's how I got started. The resources for recipes and problem-solving are ever-expanding.
10. Unexpectedly, tomato jam is one of my favorite things. It makes a fabulous and unusual gift. I gifted so many that I have just a single jar remaining.
 |
| Photo from foodinjars.com |
11. Because pressure canning tomatoes takes just 20 minutes whereas the boiling water bath method requires 90, I always pull out my pressure canner for tomatoes. Bonus: no need to monitor the water level.
12. There's always one jar that doesn't seal. I have to figure out what to do with that jar this weekend.
13. It's possible to can 20 pounds of tomatoes in a mid-week evening. (see #11 above)
14. Twenty pounds of tomatoes costs around $20 in my area, unless you hit the fruit stand late in the day and the owner unexpectedly gives you a $5 discount. Growing tomatoes for home canning in Western Washington is always a risky business due to unreliable summers.
15. It's surprising how many things you can throw a jar of canned tomatoes into: braised meats; sausage and chickpea soup; shakshuka; chili; and more.
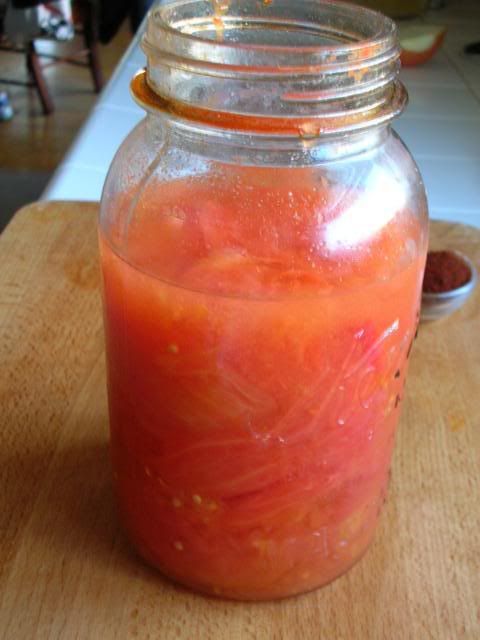
16. No matter how carefully I mete out my supply or how many jars I can, I always run out of tomatoes.
17. Twenty pounds of tomatoes equals about twelve eleven quarts. (see #12 above)
18. After you've been canning your own tomatoes for a few years, store-bought canned tomatoes look weird.
19. The cats come running when they hear the can-opener but completely ignore the sound of a home-canned jar being opened. These same cats haven't had canned cat food in nearly a decade.
20. The "ping!" sound that cooling jars makes as they seal is intensely gratifying.
Tuesday, August 30, 2011
Signals of fall
I've started to notice something over the past few days.
First, I saw it in the coop.
I had my suspicions of what was happening but I was in denial.
Today I came home to this, and I must now face the facts.

Can you see what's weird? Not quite? Here's another angle.

How about now?

This morning there were no feathers on the ground.
Every single feather has a yellowish tinge on the tip, meaning they all came from the same hen. This hen.

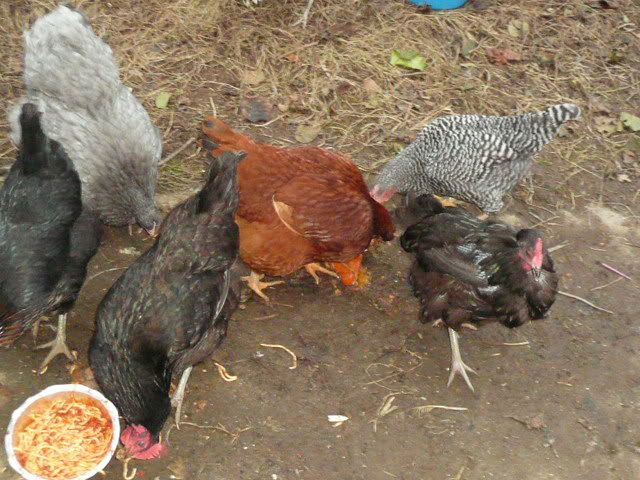
Our Buff Orpington, Curry, is molting. I think that Croquette may be molting as well. She went through a really hard, ugly molt last winter. That's her on the far right:

This means 3 things.
First, Curry and Croquette probably won't lay another egg until spring. Hens need about 2 months to recover from a molt. As a full, hard molt - as it appears Curry is experiencing - takes a month or more. Three months from now it'll be December. Our girls took the winter off last year (arg). Therefore Curry & Croquette are out of operation until April or so. Bummer.
Second, I'm going to stop selling eggs. Our hens went through really hard molts last autumn and we had a long, cold winter. We got exactly zero eggs from December until perhaps April.
Third, and most importantly, falling feathers signal autumn's arrival.
Fall is here.
First, I saw it in the coop.
I had my suspicions of what was happening but I was in denial.
Today I came home to this, and I must now face the facts.
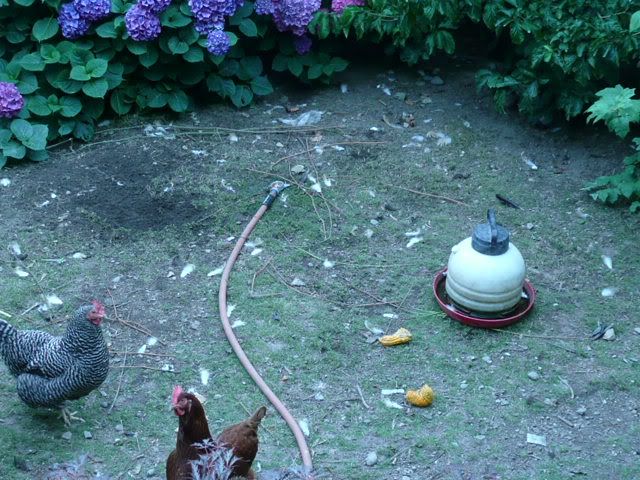
Can you see what's weird? Not quite? Here's another angle.
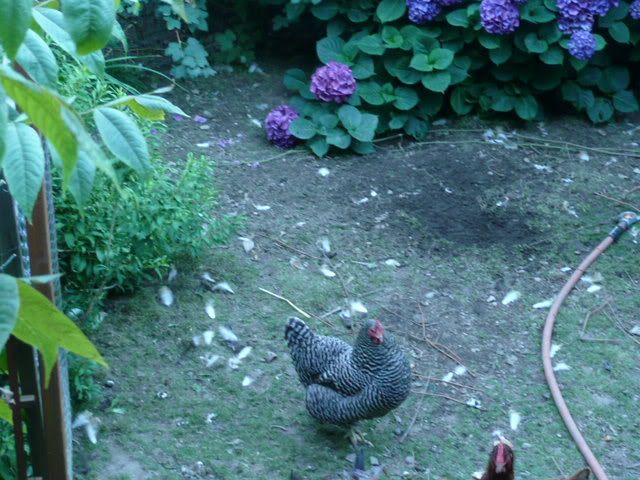
How about now?
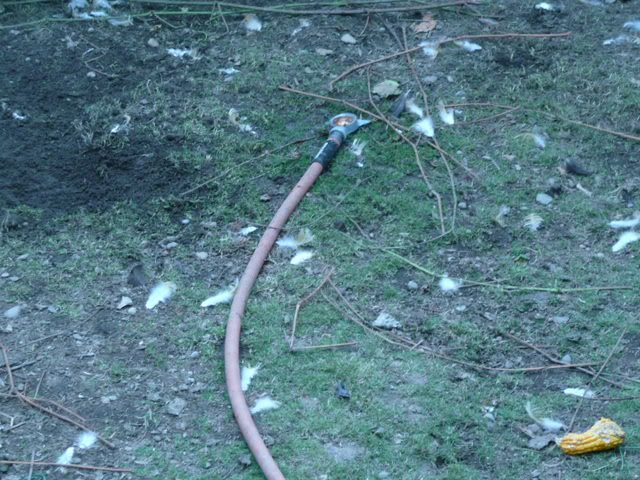
This morning there were no feathers on the ground.
Every single feather has a yellowish tinge on the tip, meaning they all came from the same hen. This hen.
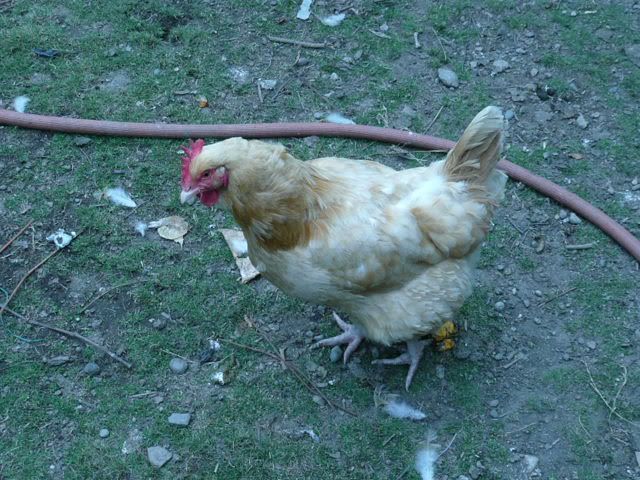
Our Buff Orpington, Curry, is molting. I think that Croquette may be molting as well. She went through a really hard, ugly molt last winter. That's her on the far right:
This means 3 things.
First, Curry and Croquette probably won't lay another egg until spring. Hens need about 2 months to recover from a molt. As a full, hard molt - as it appears Curry is experiencing - takes a month or more. Three months from now it'll be December. Our girls took the winter off last year (arg). Therefore Curry & Croquette are out of operation until April or so. Bummer.
Second, I'm going to stop selling eggs. Our hens went through really hard molts last autumn and we had a long, cold winter. We got exactly zero eggs from December until perhaps April.
Third, and most importantly, falling feathers signal autumn's arrival.
Fall is here.
Monday, August 29, 2011
My last birthday as Jenn
I turned 37 yesterday.
Up until then I could tell people that I was going to be 37 when Bean is born. No longer. Eeek. My late 30s are here. When you're 36 you're in the mid-30s... but 37. Wow. On top of that, I'm nearly done with my second trimester. Bean is due to be here in just over 3 months.
It was my final birthday as "Jenn". This time next year I'll be some variation of "Mom". I'm trying to savor my independence, spontaneity, and leisure to focus on a single task as long as I want - knitting, cooking, talking on the phone, chilling with Rosemary, etc. - while I still can. Once Bean is here, I expect that my idea of "free time" will drastically change.
I also know that in a year I'll have a hard time imagining our life without Bean.
It being my birthday, I started inviting people over. The next thing I knew, the dinner guest list was up to 10 people for dinner and another 4-6 for cake & ice cream.
I had most of the ingredients for a Spanish paella (pie-AY-ya). I couldn't find the recipe a friend once gave me so I looked up a few variations online and winged it. This same friend, a former co-worker, used to loan me her paella pan. As I rarely see her since leaving that job - and my commute to Seattle - I had to make due with my Le Creuset wannabe (seriously - the Martha Stewart stuff is OK, but it's no Le Creuset).
The great thing about paella is that if you need to stretch it, add more rice. Paella suits my cooking sensibilities really well: you use what's on hand and call it good. I do it in a slightly different order than many recipes but the end result is about the same.
This is more of a method for making paella and not so much a recipe. Putting together a paella is not excessively time-consuming or difficult but it does take some prep and fore-thought.
 Chop the ingredients for a sofrito. Everything should be about the same size.
1 onion
1-2 red or green bell peppers
1-2 tomatoes
4 cloves of garlic
Put the chopped stuff aside.
 Brown the meat.
Heat about 2T olive oil in the largest pot or pan you have. Brown the meat in batches and put it into a bowl to set aside for later.
My freezer contained 8 chicken thighs, 2 thigh quarters, 2 pork chops, and chorizo. So that's what went into my paella. There are no hard and fast rules about which meats can go into a paella. One recipe I found called for a rabbit and a chicken. Do what you want.
This was the first time I'd put pork into my paella. I cut it into slices the seasoned it with paprika, salt, pepper, and oregano. I wanted it to taste distinct from the chicken, which is why I treated it this way.
If you have or can borrow a traditional paella pan, go for it. I used an enameled cast iron pot with the most surface area I could muster. Paella is traditionally cooked outside in the grill but we were out of propane. It was inside on the gas flame for me.
 Cook the sofrito.
Next you prepare the sofrito. Simply throw all the chopped sofrito ingredients into the pan (drained of extra fat if necessary) and cook them down until you gat a thick paste. This should take about 15-20 minutes and does not need constant monitoring.
After the sofrito is done you can either continue to the last stage or put it aside and wait to start up again about 30 minutes before you want to eat.
Season the sofrito and cook the rice.
All paellas, no matter their other ingredients, seem to agree on the sofrito as one of the mandatory components. The others are saffron, which gives the paella the traditional yellow color, and rice. Use a short-grain rice such as arborio.
At this point I added the seasonings:
1/2 tsp red pepper flakes (not traditional but it gave the meal a little kick)
1 tsp paprika
1/2 tsp salt
2 T oregano
generous pinch of saffron (Trader Joe's has one for around $6 per bottle)
Here's something I haven't done in a while:

Add your rice - I used 2 cups - and 4 cups of chicken broth. I added about 2 cups of a dry white wine at this stage as well. The end result was soupier than I'd meant it to be but the rice did eventually absorb the extra liquid. If you want less rice, adjust this quantity accordingly. Keep in mind that I was planning to feed 10 people with leftovers for lunch on Monday.
Stir this sofrito-rice mix well and bring it to a simmer. Tuck your browned meats into the rice, cover tightly, and cook on low for 20 minutes or until the liquid is absorbed.
Add seafood if wanted.
It seems that every photo you see of paella includes mussels. You can also add squid, scallops, shrimp, or cod at the last minute for other seafood flavors.
We bought a pound of mussels for something like $3.50. About 10 minutes before the rice was finished cooking I tossed them on top of the paella and replaced the lid.
Serve and enjoy. Offer wedges of lemon to squeeze over the plates.
We served the paella with a beautiful spinach salad a friend had made. We ate outside, crammed around a little table but enjoying the company. Gene told me that nearly everyone went back for seconds. There was a handful of little kids, all of whom quite enjoyed feeding their leftovers to the girls, one forkful at a time. The chickens, as you may imagine, did not object.
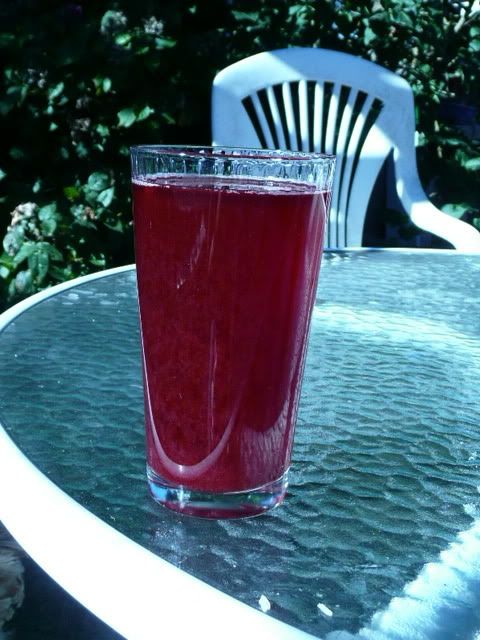
Paella goes well with beer or dry white wine. We all had lemonade and blueberry shrub (which was shockingly popular!).

Here are some paella recipes that are less fly-by-the-seat-of-your-pants and have specific quantities
http://spanishfood.about.com/od/maincourses/r/seafoodpaella.htm
http://www.alicante-spain.com/paella.html
Up until then I could tell people that I was going to be 37 when Bean is born. No longer. Eeek. My late 30s are here. When you're 36 you're in the mid-30s... but 37. Wow. On top of that, I'm nearly done with my second trimester. Bean is due to be here in just over 3 months.
It was my final birthday as "Jenn". This time next year I'll be some variation of "Mom". I'm trying to savor my independence, spontaneity, and leisure to focus on a single task as long as I want - knitting, cooking, talking on the phone, chilling with Rosemary, etc. - while I still can. Once Bean is here, I expect that my idea of "free time" will drastically change.
I also know that in a year I'll have a hard time imagining our life without Bean.
It being my birthday, I started inviting people over. The next thing I knew, the dinner guest list was up to 10 people for dinner and another 4-6 for cake & ice cream.
I had most of the ingredients for a Spanish paella (pie-AY-ya). I couldn't find the recipe a friend once gave me so I looked up a few variations online and winged it. This same friend, a former co-worker, used to loan me her paella pan. As I rarely see her since leaving that job - and my commute to Seattle - I had to make due with my Le Creuset wannabe (seriously - the Martha Stewart stuff is OK, but it's no Le Creuset).
The great thing about paella is that if you need to stretch it, add more rice. Paella suits my cooking sensibilities really well: you use what's on hand and call it good. I do it in a slightly different order than many recipes but the end result is about the same.
This is more of a method for making paella and not so much a recipe. Putting together a paella is not excessively time-consuming or difficult but it does take some prep and fore-thought.
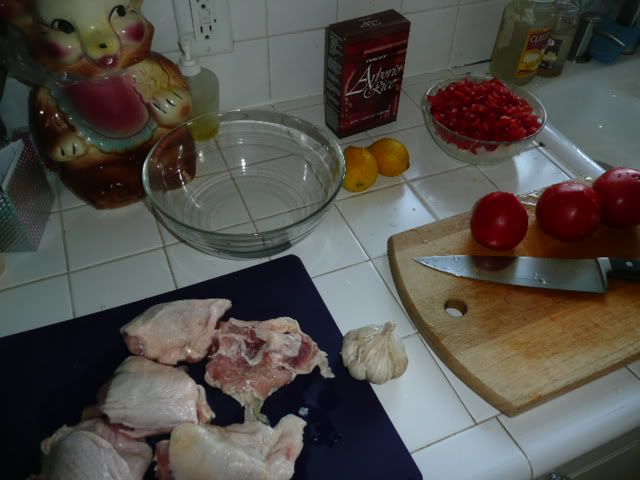
1 onion
1-2 red or green bell peppers
1-2 tomatoes
4 cloves of garlic
Put the chopped stuff aside.
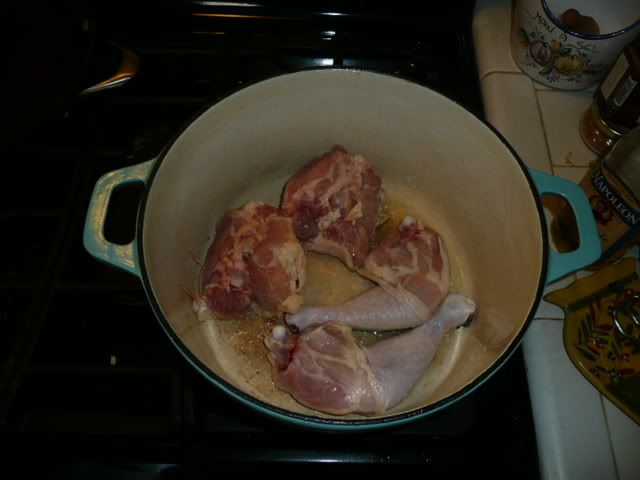
Heat about 2T olive oil in the largest pot or pan you have. Brown the meat in batches and put it into a bowl to set aside for later.
My freezer contained 8 chicken thighs, 2 thigh quarters, 2 pork chops, and chorizo. So that's what went into my paella. There are no hard and fast rules about which meats can go into a paella. One recipe I found called for a rabbit and a chicken. Do what you want.
This was the first time I'd put pork into my paella. I cut it into slices the seasoned it with paprika, salt, pepper, and oregano. I wanted it to taste distinct from the chicken, which is why I treated it this way.
If you have or can borrow a traditional paella pan, go for it. I used an enameled cast iron pot with the most surface area I could muster. Paella is traditionally cooked outside in the grill but we were out of propane. It was inside on the gas flame for me.
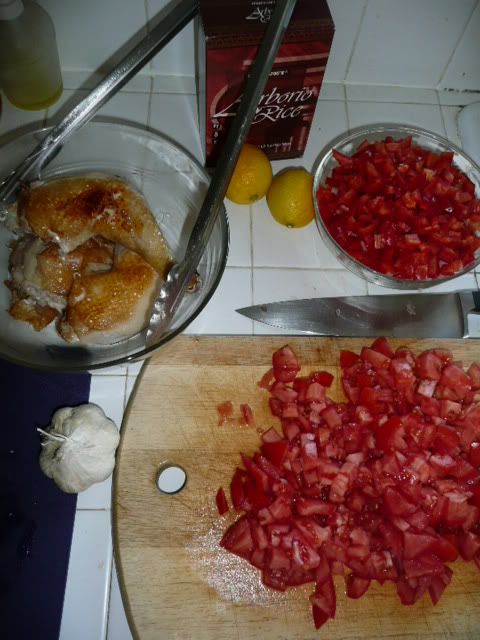
Next you prepare the sofrito. Simply throw all the chopped sofrito ingredients into the pan (drained of extra fat if necessary) and cook them down until you gat a thick paste. This should take about 15-20 minutes and does not need constant monitoring.
After the sofrito is done you can either continue to the last stage or put it aside and wait to start up again about 30 minutes before you want to eat.
Season the sofrito and cook the rice.
All paellas, no matter their other ingredients, seem to agree on the sofrito as one of the mandatory components. The others are saffron, which gives the paella the traditional yellow color, and rice. Use a short-grain rice such as arborio.
At this point I added the seasonings:
1/2 tsp red pepper flakes (not traditional but it gave the meal a little kick)
1 tsp paprika
1/2 tsp salt
2 T oregano
generous pinch of saffron (Trader Joe's has one for around $6 per bottle)
Here's something I haven't done in a while:
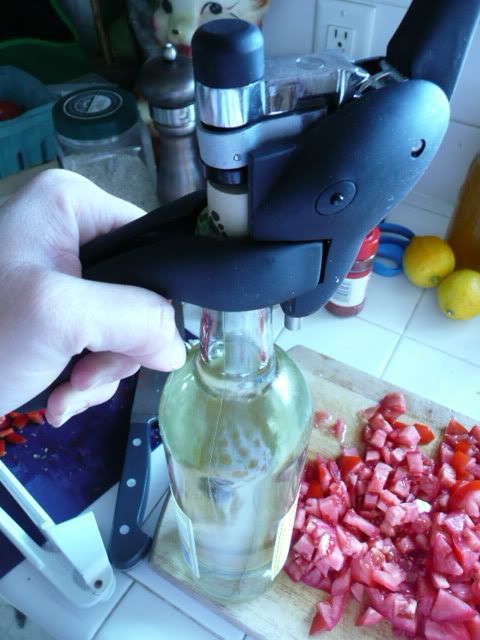
Add your rice - I used 2 cups - and 4 cups of chicken broth. I added about 2 cups of a dry white wine at this stage as well. The end result was soupier than I'd meant it to be but the rice did eventually absorb the extra liquid. If you want less rice, adjust this quantity accordingly. Keep in mind that I was planning to feed 10 people with leftovers for lunch on Monday.
Stir this sofrito-rice mix well and bring it to a simmer. Tuck your browned meats into the rice, cover tightly, and cook on low for 20 minutes or until the liquid is absorbed.
Add seafood if wanted.
It seems that every photo you see of paella includes mussels. You can also add squid, scallops, shrimp, or cod at the last minute for other seafood flavors.
We bought a pound of mussels for something like $3.50. About 10 minutes before the rice was finished cooking I tossed them on top of the paella and replaced the lid.
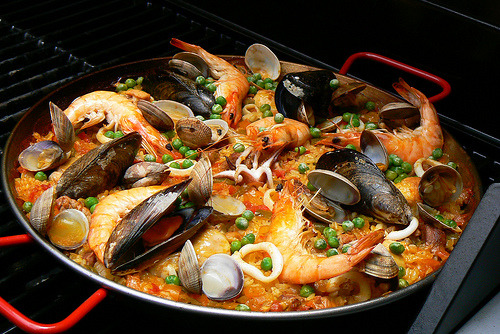 |
| Not my pic... I got busy & forgot to take a photo of the finished dish. |
We served the paella with a beautiful spinach salad a friend had made. We ate outside, crammed around a little table but enjoying the company. Gene told me that nearly everyone went back for seconds. There was a handful of little kids, all of whom quite enjoyed feeding their leftovers to the girls, one forkful at a time. The chickens, as you may imagine, did not object.
Paella goes well with beer or dry white wine. We all had lemonade and blueberry shrub (which was shockingly popular!).
Here are some paella recipes that are less fly-by-the-seat-of-your-pants and have specific quantities
http://spanishfood.about.com/od/maincourses/r/seafoodpaella.htm
http://www.alicante-spain.com/paella.html
Wednesday, August 24, 2011
Earthquake memories
Yesterday's earthquake on the east coast brought back memories of the shakers I've experienced in my lifetime.
Washington (State) has had its fair share of rattles over the years. I was 5 when Mt. St. Helens blew her lid, and I remember the ash dustings we got in Tacoma: they looked like frost and the gardens had a particularly good year as a result of the extra nutrients. There were plenty of rumbling earthquakes in the months before and after the blast, most small.
Having grown up in Western WA, I've gone through countless earthquake drills from the time I was in grade school. My most recent one was just a few months ago at work.
The biggest earthquake I ever experienced was the Nisqually Earthquake in February 2001. Nisqually is an area between Tacoma and Olympia, our state capitol, and was the epicenter. I was living and working in Tacoma, as I still do, though at a different university.
It was a beautiful February morning, and unseasonably warm and sunny. I had gone to a monthly all-unit meeting in another building across campus, leaving my coat and purse in my office.
The building where we had the meeting was constructed in the 1940s. It had some funny characteristics to it, one of which was that the terrazzo floors would bounce in certain spots if even the smallest college girl walked past you. It's a handsome brick building with lots of masonry.
The meeting was over and my co-worker - we'll call him Ted - and I had just left the meeting room. Ted was, and still is, a tall, athletic man's man. He's funny and smart, and harbors a deep love for white-water kayaking and mountain biking.
As Ted and I rounded the corner I noticed that the floor was bouncing. I slowed down and looked around for the wee sorority girl who was making the floor seem so unstable.
No sooner had I stopped in my tracks did Ted squeal "earthquake!". Being from the northeast and probably never having been an earthquake, real or drilled, Ted freaked the eff out. He shoved me aside and ran from the building, just like you saw people doing on the news yesterday. He later told me that once outside, he saw the ground swell and heave like the ocean. He nearly heaved himself!
I'd been through several earthquakes, though none this strong. Later on we would find out that it was a 6.8. As Ted ran away, I walked to the archway that was just 5 feet away and waited out the earthquake. There was a table nearby but it was right next to a large glass window. I was safer next to an interior wall anyway.
The building's restrooms were right next to me. I chuckled to myself as college students ran out of the bathroom, tugging up their jeans and begging to be told what to do. "Stay where you are and hold on," I told them.
The shaking went on for some 25-30 seconds, which seems an eternity when you're wondering if the building will fall down around your ears. It didn't. Tacoma is on a foundation of granite. Even though we were 30 miles closer to the epicenter than Seattle, Seattle experienced a great deal of shaking and damage due to its foundation of glacial deposits.
After the shaking subsided I found a phone and tried to call my grandma, who lived about 1.5 miles from my office. I couldn't get a local line and was quickly shooed outside by security staff anyway.
Do you know how weird it is to see a university's population outside all at once? You rarely think about how many people are there - students, faculty, and staff - and it's shocking to see everyone together at once.
I had left my coat and purse in my office when going to my meeting. Facilities would not permit people into the buildings until inspections had occurred: without my purse I was stuck on campus without any way to contact loved ones. Cell phones weren't as ubiquitous a decade ago as they are now. Thank goodness the weather was warm.
I'm still terrible about leaving my purse, and even my cell phone, in my office when I leave the building. It's been a difficult habit to change, though I suppose I should try harder.
When I finally got home later that afternoon, I found my 2 cats unharmed but skittish. Quite a few items had "walked" to the edges of shelves in my apartment but nothing was broken. I was very lucky.
It's been on my to-do list ever since to create an earthquake kit. I think of it each time I hear of one occurring. I put it off for another time and rationalize that we've got so many jars of food at home that we'd be fine. But what about the animals? What about water? What about our son?
Are you ready for a disaster? I certainly don't feel prepared.
Here's a website to help us all get started: http://www.ready.gov/.
Washington (State) has had its fair share of rattles over the years. I was 5 when Mt. St. Helens blew her lid, and I remember the ash dustings we got in Tacoma: they looked like frost and the gardens had a particularly good year as a result of the extra nutrients. There were plenty of rumbling earthquakes in the months before and after the blast, most small.
Having grown up in Western WA, I've gone through countless earthquake drills from the time I was in grade school. My most recent one was just a few months ago at work.
The biggest earthquake I ever experienced was the Nisqually Earthquake in February 2001. Nisqually is an area between Tacoma and Olympia, our state capitol, and was the epicenter. I was living and working in Tacoma, as I still do, though at a different university.
It was a beautiful February morning, and unseasonably warm and sunny. I had gone to a monthly all-unit meeting in another building across campus, leaving my coat and purse in my office.
The building where we had the meeting was constructed in the 1940s. It had some funny characteristics to it, one of which was that the terrazzo floors would bounce in certain spots if even the smallest college girl walked past you. It's a handsome brick building with lots of masonry.
The meeting was over and my co-worker - we'll call him Ted - and I had just left the meeting room. Ted was, and still is, a tall, athletic man's man. He's funny and smart, and harbors a deep love for white-water kayaking and mountain biking.
As Ted and I rounded the corner I noticed that the floor was bouncing. I slowed down and looked around for the wee sorority girl who was making the floor seem so unstable.
No sooner had I stopped in my tracks did Ted squeal "earthquake!". Being from the northeast and probably never having been an earthquake, real or drilled, Ted freaked the eff out. He shoved me aside and ran from the building, just like you saw people doing on the news yesterday. He later told me that once outside, he saw the ground swell and heave like the ocean. He nearly heaved himself!
I'd been through several earthquakes, though none this strong. Later on we would find out that it was a 6.8. As Ted ran away, I walked to the archway that was just 5 feet away and waited out the earthquake. There was a table nearby but it was right next to a large glass window. I was safer next to an interior wall anyway.
The building's restrooms were right next to me. I chuckled to myself as college students ran out of the bathroom, tugging up their jeans and begging to be told what to do. "Stay where you are and hold on," I told them.
The shaking went on for some 25-30 seconds, which seems an eternity when you're wondering if the building will fall down around your ears. It didn't. Tacoma is on a foundation of granite. Even though we were 30 miles closer to the epicenter than Seattle, Seattle experienced a great deal of shaking and damage due to its foundation of glacial deposits.
After the shaking subsided I found a phone and tried to call my grandma, who lived about 1.5 miles from my office. I couldn't get a local line and was quickly shooed outside by security staff anyway.
Do you know how weird it is to see a university's population outside all at once? You rarely think about how many people are there - students, faculty, and staff - and it's shocking to see everyone together at once.
I had left my coat and purse in my office when going to my meeting. Facilities would not permit people into the buildings until inspections had occurred: without my purse I was stuck on campus without any way to contact loved ones. Cell phones weren't as ubiquitous a decade ago as they are now. Thank goodness the weather was warm.
I'm still terrible about leaving my purse, and even my cell phone, in my office when I leave the building. It's been a difficult habit to change, though I suppose I should try harder.
When I finally got home later that afternoon, I found my 2 cats unharmed but skittish. Quite a few items had "walked" to the edges of shelves in my apartment but nothing was broken. I was very lucky.
It's been on my to-do list ever since to create an earthquake kit. I think of it each time I hear of one occurring. I put it off for another time and rationalize that we've got so many jars of food at home that we'd be fine. But what about the animals? What about water? What about our son?
Are you ready for a disaster? I certainly don't feel prepared.
Here's a website to help us all get started: http://www.ready.gov/.
Thursday, August 18, 2011
I drink vinegar
I've been drinking vinegar lately.

Granted, my expanding belly & swollen ankles have made it pretty clear that my condition is nothing short of "delicate". I've not been inclined towatrd any bizarre cravings. In fact I haven't even been that hungry for about the past month since Bean's last growth spurt left him pressed beneath my stomach, significantly reducing the "eat, and eat NOW" signals to my brain.

No, "drinking vinegar" (as a noun) is an old-fashioned beverage called a "shrub".
OK, get it out of your system...
Done?
NPR recently did a story about shrubs, or drinking vinegars. Then a friend of mine who'd heard the same story posted pictures of her concoctions on her facebook page. Being pregnant, unable to partake of my nightly glass of wine, and highly susceptible to edible suggestions, I was game to try it for myself.
A little internet research on the topic revealed that I'm perhaps a little behind the trend:
Granted, perhaps it's not a "trend", per se, if drinking vinegars have been around since Roman times. This is the best resource I found on shrubs, both on their history but also on their preparation.
There are two methods to make a shrub: hot and cold. Both are simple. Hot is fast, cold is slow. I happened to have blackberries that were rapidly deteriorating, and blueberries that I bought (unknowingly) past their prime. Both are ideal for shrubs - save the perfect fruit for preserves. I used raspberry vinegar that I'd made 2 years ago and had no idea what to do with... until now!

Blackberry Shrub (hot/fast method)
1 cup blackberries
1 cup cider vinegar
1 cup sugar
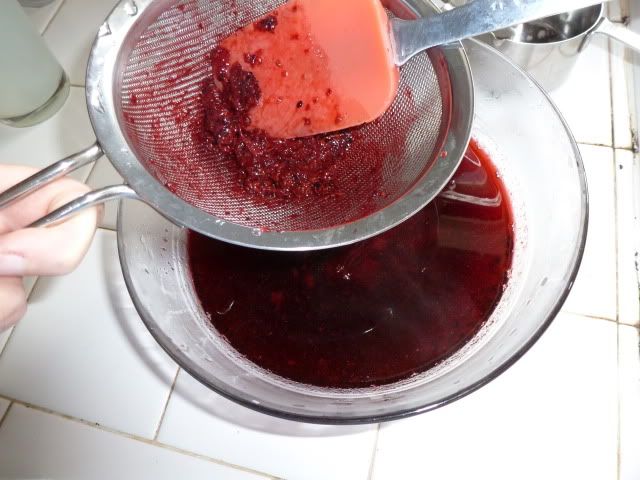
Heat berries & vinegar in a saucepan until boiling, boil for 10 minutes. Strain out the berries and add the sugar. Allow to cool. Store in fridge. Mix 1 part shrub syrup to 4 parts water or club soda (or make ratio to your taste).
Blueberry Shrub (cold/slow method), recipe from Epicurious
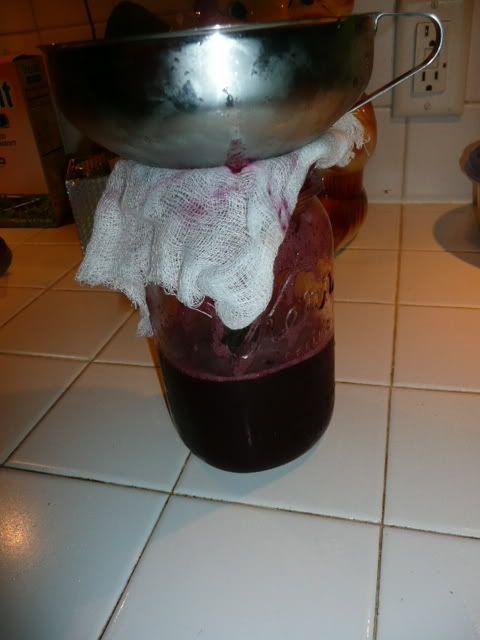
I recommend mashing the berries before macerating them in the vinegar for a few days. Otherwise you don't get as much flavor from the berries in the syrup. You will have to strain the mixture but the extra effort is worthwhile.

Still feeling adventurous? Here are a few more recipes, these taken from cookbooks dating to the 1800s.
By now you're surely thinking: "Jenn, get to the point: what does it taste like". I think that the flavor profile is a lot like a lemonade: sour and sweet at the same time. It smells faintly like vinegar but not overpoweringly so. It is, as reported elsewhere, very refreshing and addictive. One person wrote that it they felt they'd found their first "true non-alcoholic beverage for adults". I like it because it's not cloyingly sweet.
You can use it as a mixer for cocktails but be mindful of the acid. Imagine a blended blackberry shrub margarita. Oh yum. Blueberry shrub muddled with rum and mint? Yes, please. Raspberry shrub and vodka over ice? Yes yes yes!
The second time I had a glass - and I find myself drinking 2 glasses at a time - I poured more of the syrup than I thought I'd want. It was better with more syrup! It was sweeter and less tart. Strange but good.
If you're looking for something new (but old), want to offer unique non-alcoholic beverages to your guests, or even are searching for a new cocktail mixer, try making a shrub.
Besides, it's kinda fun to see the look on people's faces when you tell them you drink vinegar.
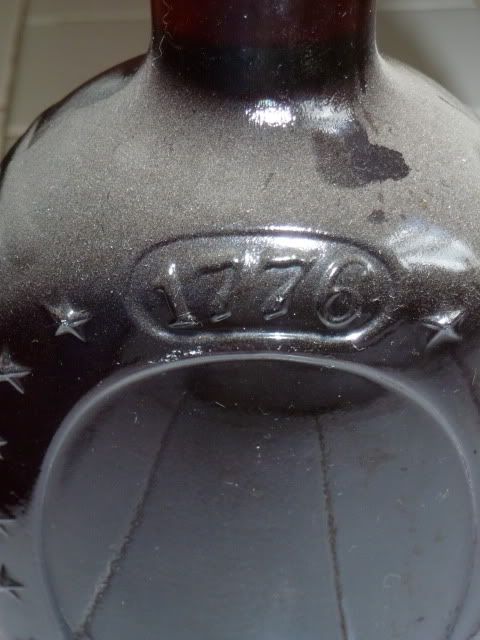
And no, this isn't a weird pregnancy thing.
No, "drinking vinegar" (as a noun) is an old-fashioned beverage called a "shrub".
OK, get it out of your system...
Done?
NPR recently did a story about shrubs, or drinking vinegars. Then a friend of mine who'd heard the same story posted pictures of her concoctions on her facebook page. Being pregnant, unable to partake of my nightly glass of wine, and highly susceptible to edible suggestions, I was game to try it for myself.
A little internet research on the topic revealed that I'm perhaps a little behind the trend:
- NYT wrote about them 4 years ago.
- Epicurious posted a recipe for a blueberry shrub in 2010.
- Marisa of FoodinJars included a shrub in a beverage theme week earlier this summer.
Granted, perhaps it's not a "trend", per se, if drinking vinegars have been around since Roman times. This is the best resource I found on shrubs, both on their history but also on their preparation.
There are two methods to make a shrub: hot and cold. Both are simple. Hot is fast, cold is slow. I happened to have blackberries that were rapidly deteriorating, and blueberries that I bought (unknowingly) past their prime. Both are ideal for shrubs - save the perfect fruit for preserves. I used raspberry vinegar that I'd made 2 years ago and had no idea what to do with... until now!
1 cup blackberries
1 cup cider vinegar
1 cup sugar
Heat berries & vinegar in a saucepan until boiling, boil for 10 minutes. Strain out the berries and add the sugar. Allow to cool. Store in fridge. Mix 1 part shrub syrup to 4 parts water or club soda (or make ratio to your taste).
Blueberry Shrub (cold/slow method), recipe from Epicurious
I recommend mashing the berries before macerating them in the vinegar for a few days. Otherwise you don't get as much flavor from the berries in the syrup. You will have to strain the mixture but the extra effort is worthwhile.
Still feeling adventurous? Here are a few more recipes, these taken from cookbooks dating to the 1800s.
By now you're surely thinking: "Jenn, get to the point: what does it taste like". I think that the flavor profile is a lot like a lemonade: sour and sweet at the same time. It smells faintly like vinegar but not overpoweringly so. It is, as reported elsewhere, very refreshing and addictive. One person wrote that it they felt they'd found their first "true non-alcoholic beverage for adults". I like it because it's not cloyingly sweet.
You can use it as a mixer for cocktails but be mindful of the acid. Imagine a blended blackberry shrub margarita. Oh yum. Blueberry shrub muddled with rum and mint? Yes, please. Raspberry shrub and vodka over ice? Yes yes yes!
The second time I had a glass - and I find myself drinking 2 glasses at a time - I poured more of the syrup than I thought I'd want. It was better with more syrup! It was sweeter and less tart. Strange but good.
If you're looking for something new (but old), want to offer unique non-alcoholic beverages to your guests, or even are searching for a new cocktail mixer, try making a shrub.
Besides, it's kinda fun to see the look on people's faces when you tell them you drink vinegar.
Subscribe to:
Posts (Atom)