Showing posts with label dark days challenge. Show all posts

Wednesday, March 9, 2011

Pancetta and bacon update

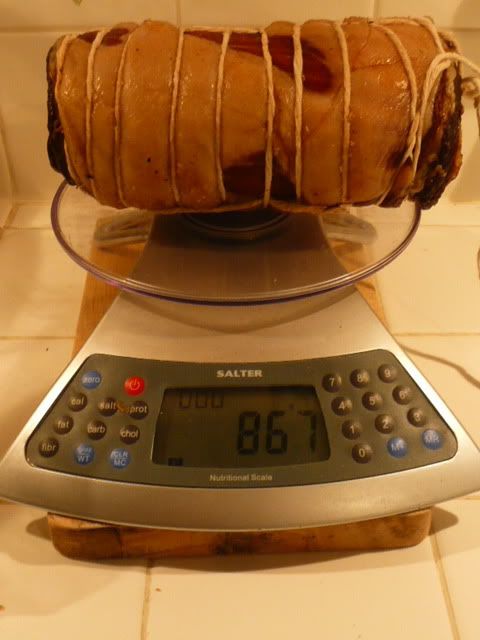
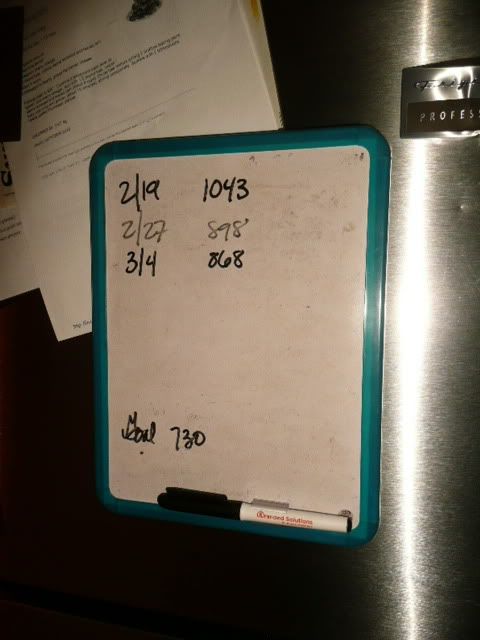
My pancetta started out on February 19 at 1043 grams, or a little over 2 1/4 pounds.  I'm glad I wrote down the dates.


As you can see, it's just 868 as of last weekend whereas it should be closer to 730.


Our weather went through a very dry and cold spell.  According to what I've read, the meat may have developed a crust on it, which isn't allowing the moisture to escape any longer. 

The remedy is to wrap the meat in plastic, put it in the fridge for a few days to allow the moisture in the meat to redistribute, then hang it back up again.  And that's what I've done. 

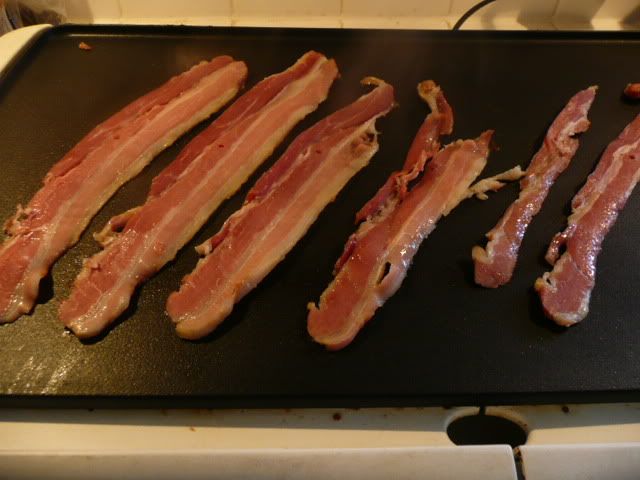
My bacon, on the other hand, is a whole other delicious story.  Last weekend I cut off a few slices and cooked them on the griddle.  The meat is much leaner than store bacon.  Nicely done, Lisa!

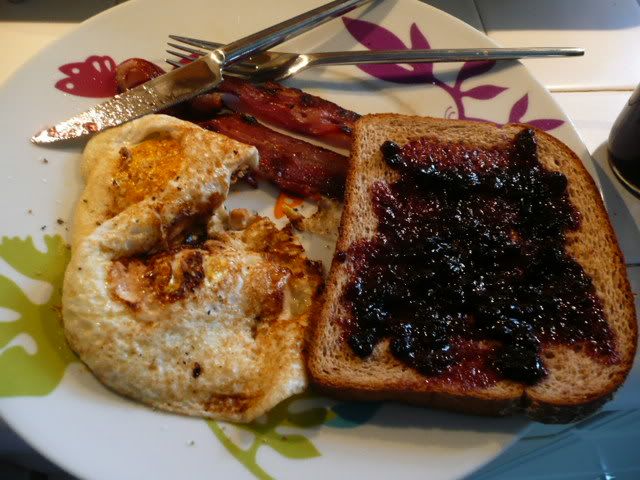
Gene and I had that bacon with fresh eggs from our girls, Poulsbo bread toast, and blueberry citrus conserves I canned (they're my favorite).

Monday, March 7, 2011

Corned beef & Irish soda bread

March's Charcutepalooza challenge was to brine something.  With a cabinet full of pickled cukes, squash, beans, and cabbage, and Saint Patrick's Day not far off, I wanted to try corned beef.

I concocted the brining mixture a week ago and set my locally sourced brisket for a soak.  The recipe called for a five-pound slab but that's a LOT of meat.  I settled on one that was a little under three.

BTW, one of the Charcutepalooza rules was to not include the recipes because they're in a copyrighted book.  Check out Alton Brown's corned beef, which you could do in five days.  Change out Alton's herbs & spices for pickling spice available in the bulk spices section of the grocery store.

If you start yours next Saturday, it'll be perfect for a Saint Patrick's evening meal.  Go on, do it!  The brining takes just five minutes to get going.


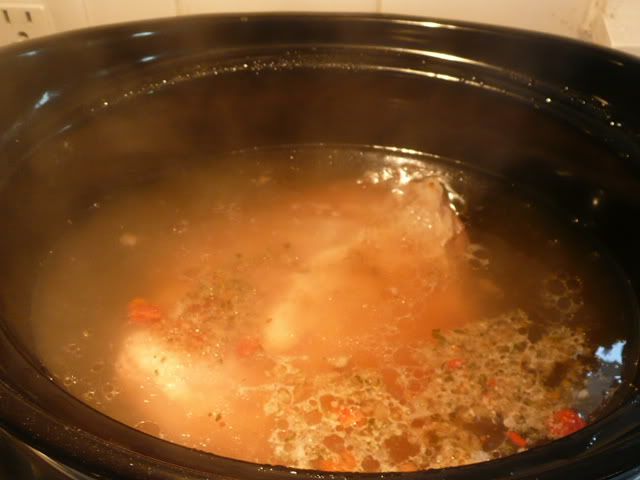
After the requisite five-day period of brining the meat, I rinsed it and put it unceremoniously into the crockpot with some fresh water and about a tablespoon of this vegetable bouillion.  Gene and I had a million errands to run, not one of which was in the same part of town.  The corned beef was left on its own for a few hours.  When we came back it smelled good but was rather tough.  I cranked up the heat in the hopes of breaking down the connective tissues before we left for our friends' house.

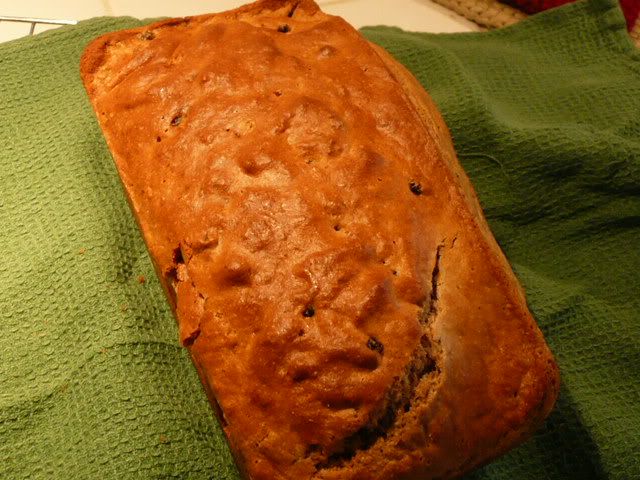
While that was cooking I whipped up a batch of Irish soda bread, adapted from this recipe.  I was completely out of white flour and made it instead with whole wheat.  I increased the leavening agents to lift the heavier whole wheat flour.  It turned out really well and I'll definitely make it again.  This is a bread you could make the night before and reheat.

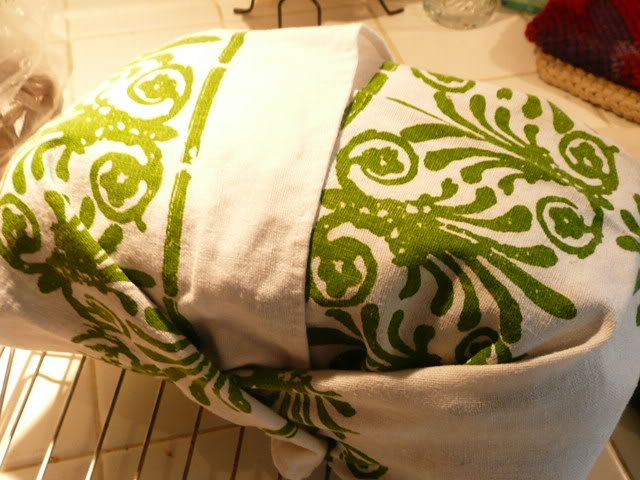
As soon as it came out of the oven I wrapped it in a linen towel and we dashed to our friends house, bread and beef in hand.


I am relieved to report that the corned beef did tenderize and was quite good.  The flavor of the pickling spices had permeated the meat.  Our friends, parents of two young children, welcomed us - and the culinary offerings - with open arms.  They had made boiled potatoes, carrots, and cabbage.  With spicy brown mustard and a local red wine, this was a warming meal shared with good friends.

I regret that I have no photos of our completed dinner.  We were enjoying our evening and completely forgot.  I can say, though, that the corned beef retained a nice pink color and had great flavor.  The kids loved the bread, too!


IRISH SODA BREAD WITH CURRANTS
1 cup all-purpose flour
2 cups whole wheat flour
1.5 tablespoons baking powder
1/3 cup white sugar
1 teaspoon salt
1 teaspoon baking soda
1 egg, lightly beaten
2 cups milk + 1 tablespoon vinegar (or use buttermilk if you have it - I didn't)
3 tablespoons butter, melted
1/2 cup dried currants, such as Zante

1.Preheat oven to 325 degrees F. Grease a 9x5 inch loaf pan.
2.Combine dry ingredients. Blend wet ingredients together, and add all at once to the flour mixture. Mix just until moistened. Add currants gently.  Pour into prepared pan.
3.Bake for 65 to 70 minutes, or until a toothpick inserted in the bread comes out clean.

Note for convection ovens - my loaf was done at 55 minutes. 

The original recipe says to let this cool & wrap overnight.  Blah blah blah.  Screw waiting for it to cool down.  It's utterly delicious served piping hot with butter.


-----------

A year ago today I started this little blog.  Thank you so much for reading.

Wednesday, March 2, 2011

Sausage and chickpea soup

This is one of the best soups I've made in a long while.  It's an interesting combination of flavors that I wouldn't have come up with on my own.  The result is a hearty dish that's spicy and fresh at the same time.  We liked it a lot. 

I'd like to make a vegetarian version at some point, as the sausage adds a lot of calories to this soup.  I think that replacing the sausage with carrots, parsnips, and sausage-esque seasonings (think: fennel, red pepper flakes, paprika, parsley) would be delicious.


From Dinner with Julie

Sausage & Chickpea Soup


1 lb. hot Italian sausage
1 head garlic, cloves separated, peeled and chopped
1 pickled jalapeño pepper, finely chopped
1 tsp. cumin
1 quart canned tomatoes
1 cup dried chickpeas, soaked overnight, rinsed and drained
1 quart chicken stock
a squeeze of fresh lime juice
fresh cilantro
1 avocado, peeled and chopped

In a large saucepan or Dutch oven, cook sausage and garlic and sauté until the sausage is golden brown and cooked through, breaking up with your spoon. Add the jalapeño and cumin and cook for another minute or two.

Add the tomatoes, chickpeas and stock and bring to a simmer. Reduce heat to medium-low and cook for 30 minutes, until everything is cooked through and the broth has thickened slightly. Add a squeeze of lime, season with salt and pepper and serve hot, topped with fresh cilantro, chopped avocado, and extra lime wedges alongside. Serves 4.


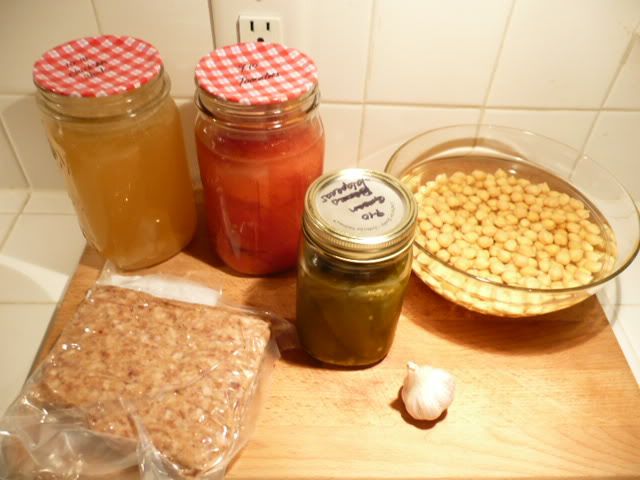
LOCAL: chicken broth, tomatoes, pickled jalapenos from my garden, garlic, sausage
NOT LOCAL: Bob's Red Mill garbanzo beans, cilantro, avocado, lime

As an aside, this is a great use for pickled jalapenos.  I grew 2 plants on my parking strip and didn't know how hot they would be as I'd never had luck with jalapenos before and it was a cold summer.  I gifted a jar to a girlfriend at work for her birthday and she later told me that even her heat-loving son thought that they were really hot!  I'm thinking of giving a jar to our department head who was raised in India.  Last fall he brought a viciously hot pepper puree of some kind, which made me cough and sputter when a seed affixed itself to my esophagus, much to his amusement.

Monday, February 28, 2011

Poached eggs on toast

Poached eggs on toast have long been one of my favorite meals.  Our hens are laying again after a 6-week period of no eggs.  Some of our girls stopped laying in late October or November, meaning that they took over 3 months of vacation.  It's about time they started paying their rent again.  Not only are we eating our own eggs instead of storebought ones, I'm able to sell eggs again.

Hint... hint... if any of my Tacoma readers want naturally nested, cage-free, free-range, humanely raised eggs from hens with names, let me know.  At $4/dozen they're less than at the closed-for-the-season Broadlway farmers market.

And to you midwesterners selling your eggs for $2/dozen, shush. This is the city.

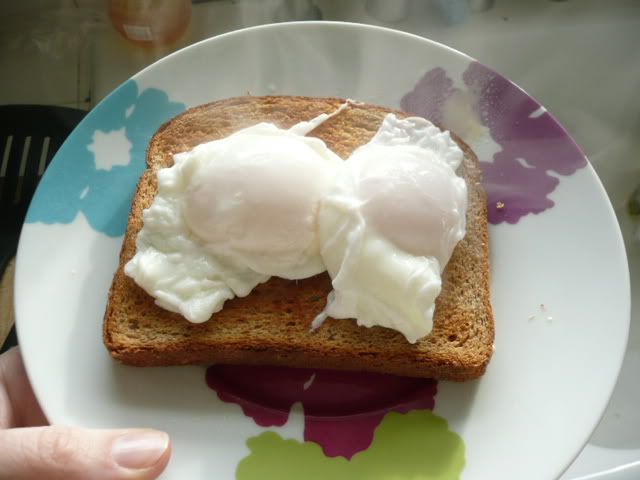
Anyway, poached eggs are simple and quick to make.  You can go from conceptualization to digestion in maybe 8 minutes.  With the egg already perched on top of the toast, there's no chance of that delicious, runny yolk going to waste.  Just a little salt and pepper makes this the perfect meal.

Poached eggs
Eggs
Toast

Bring water to a low boil (hot enough so that it bubbles but isn't violently boiling) in a saucepan.  Crack your eggs into a small bowl or cup.  Slowly tip your cup into the water and allow the egg to slide in.  Since the water is on a low boil, the egg shouldn't go far. 

Some people swear by the swirling water method, which I think is pretty silly.  Don't bother.

Cook your egg to the desired doneness.  For me this took maybe 3-4 minutes.  I've always loved runny, goopy egg yolks.

Scoop the egg out of the water with a slotted spoon and serve on hot toast with salt, pepper, and/or hot sauce.  Heck, go crazy and dump some hollandaise on there if you need the extra calories in your diet.


Bread: Poulsbo Bread
Eggs: from our yard, I think Beaker & Dozer laid these

UPDATED around 5:20 p.m. - Friends have been asking me on my personal Facebook page how I did this.  [shrug]  I've never had poached eggs go wrong so it never occurred to me that they could.  I think that the key lies in a low cooking temperature.  Don't let your water come to a full boil.  See this link for pictures of water at various cooking temps.

Something my dad always does, which I never do anymore, is to submerge the entire egg (in shell) into a pot of boiling water for roughly 30 seconds.  His eggs always turned out well.  In retrospect I think it may function to coagulate the egg white a bit, helping it stay together in the water while being poached.

Sunday, February 27, 2011

Ugly soup

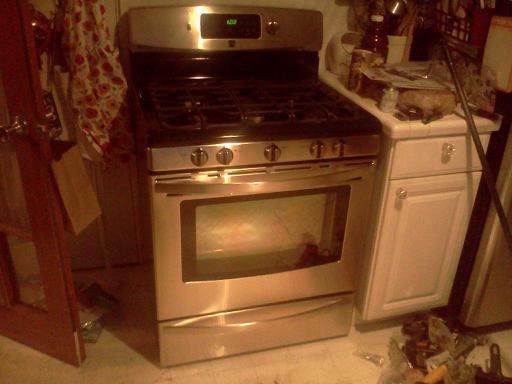
In January, as part of my 2011 resolutions, I was cleaning and ran the oven through a self-cleaning cycle.  Little did I know that would be its swan song.  It never worked right after that, unable to reach temperatures much above "lukewarm".

Gene and I soon went out and picked a new gas oven to replace the old electric one.  The problem is that while we have natural gas in the house for heat and hot water, the kitchen isn't plumbed for gas.  In addition, the delivery date for the oven was a couple of weeks out.  We've been hobbling along without a functional oven for over a month.    As someone who blogs about, among other things, food, that has been a particularly disheartening turn of events.  I have bacon to make, dagnabbit!

On the bright side, yours truly is getting a gas stove.  I haven't cooked on gas since I lived in France over 15 years ago and I cannot wait.

The other bright side is that this is a convection oven.  Yippee!  Though, truth be told, I have no idea what that means in terms of how it'll affect my cooking.

Other upgrades include a newish stainless steel over-the-range microwave we got on Craigslist for $40 and a pot-filler faucet to be installed in the near future above the stove.

All in all the dead oven wasn't such a bad thing, though I'm not excited about the cost.  Alas.

With no oven we've been grilling on the BBQ and cooking on the stove top.  It sucks to BBQ when you can see your breath.

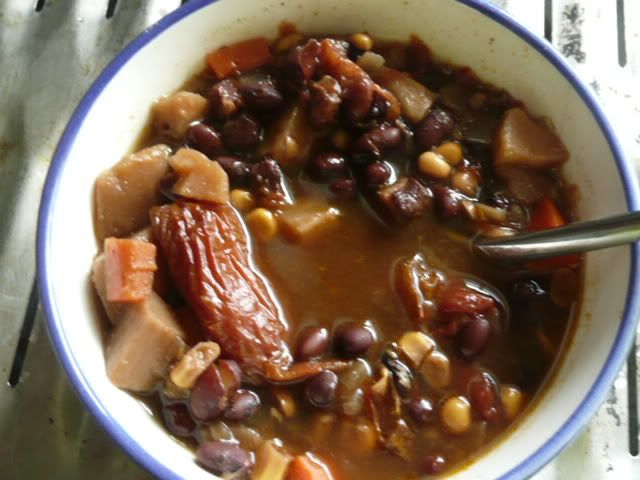
I used up a variety of withering ingredients for this soup and, as the title suggests, it's not going to win any beauty contests but it makes up for it in tastiness and healthiness.


Ugly soup
1 cup dried black beans, soaked and rinsed (ugly ingredient #1)
Olive oil
1/2 onion, diced
3 diced parsnips
4-6 diced carrots
1 cup corn
broth or bouillon of your choice (I used a homemade veggie bouillon, which meant I needed no additional salt)
handful of dehydrated tomatoes (ugly ingredient #2)
1 tbsp cumin
1/2 tsp red pepper flakes
3 ounces salt pork (or use any flavorful meat, such as sausage)
Salt & pepper to taste

In a large stockpot, cook onion in ~1 tablespoon olive oil over medium heat until translucent.  Toss in the root veggies and cook another few minutes to caramelize and get flavor.

Add the corn, tomatoes, meat, and seasonings, then cover everything with your liquid of choice.  Simmer for an hour or longer, depending upon how much time you have.

Serve with a crusty bread to sop up the brothy goodness.

Why is this ugly?  First, the black beans turn everything else a murky brown, like the white parsnips and corn.  The rehydrated tomatoes swell up and look like rusty-brown globs. They're not sexy, but they are tasty.

Most of my ingredients were locally sourced, with the exceptions being the beans, seasoning, and olive oil.  The salt pork is a byproduct of the February Charcutepalooza Challenge, bacon and/or pancetta, and comes from Lucky Pig Farm.

Look what was waiting for me when I got home today (pardon the cruddy cell phone picture).

I plan to break it in tomorrow.

Monday, February 14, 2011

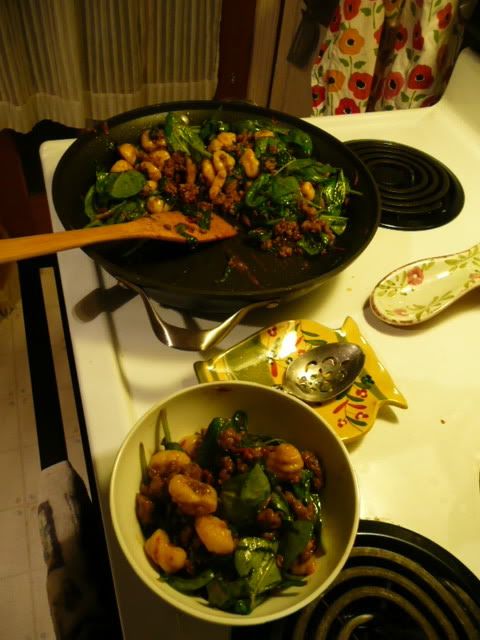
Gnocchi with greens, sausage, and tomatoes

We ate a LOT of gnocchi after that massive batch.  Here's one variation on a theme:


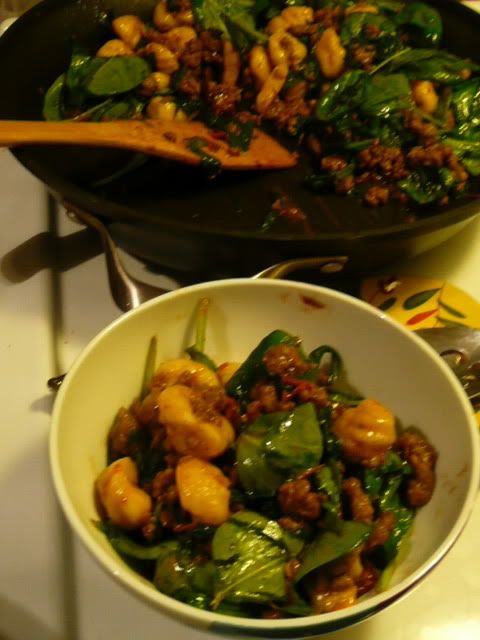
I whipped up a batch of gnocchi and served it with spinach, sundried tomatoes I made last summer, Lucky Pig Farm spicy Italian sausage, and a little bit of home-canned chicken broth to give it a sauce.  Lisa's sausage is so flavorful that I didn't even add salt.  Get the best sausage you can and give this a go.

This was super fast to make:

1. Boil a big pot of water (the bigger the better because the frozen gnocchi will cool the water down).
2. While the water is heating up, cook up the sausage.  Add chopped sundried tomatoes.  Garlic and diced onions would be good, too!  Stir in a little broth to make a sauce.
3. Once the water boils, throw in a handful of frozen gnocchi per person.  When they float, scoop them out with a slotted spoon and drop them right into the sausage mixture.
4. Toss with some greens - any would be good - until the greens are wilted and serve.

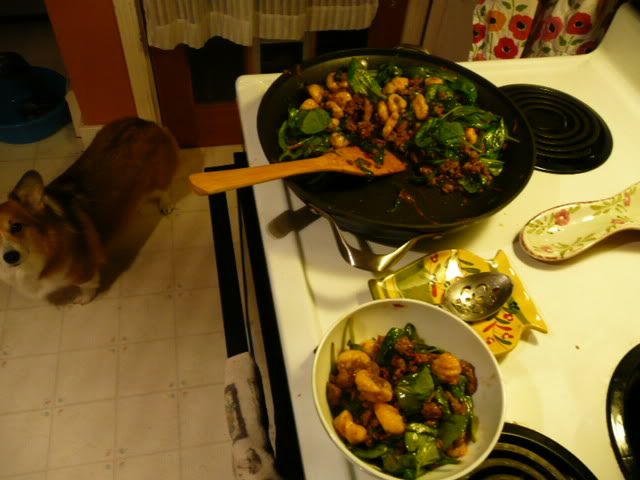
You have nommies for me?
Rosemary is like any dog: always underfoot and hoping for scraps to fall.  That's how I discovered that she loves frozen blueberries, by the way.  Silly dog.


The only non-local ingredient was the spinach.  We need our greens!  This is a hearty, delicious meal and a little goes a long way.  I made it quite a few times, including once for my brother.  Serve with a robust wine and ignore the torrential rains outside.

Friday, February 11, 2011

Gnocchi... OH!

On a recent weekend I got it into my head that I needed to make gnocchi from scratch.  I still had some potatoes from my garden and this would be a good way to use some of them.  Besides, the gnocchi you buy in the grocery store can be pretty gummy and I knew I could improve on it.

I did some research on recipes and figured that Mario Batali probably knew what he was doing.  Besides, his parents have a deli in Seattle and he used to live in Italy - his recipes carry street cred.  I decided to use this basic gnocchi recipe, which you can find here.

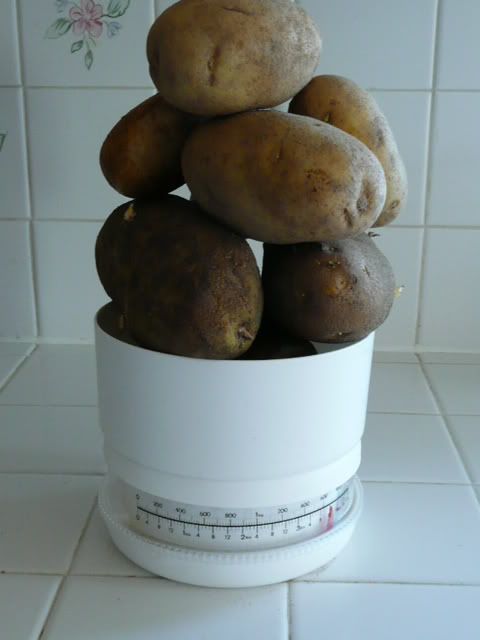
After skimming the recipe I decided to increase the potatoes from 3 pounds to 4.  My reasoning was that 3 pounds of baked or mashed potatoes doesn't go very far and since I was going through the effort of making gnocchi, dammit, I'd make the hell out of some gnocchi.

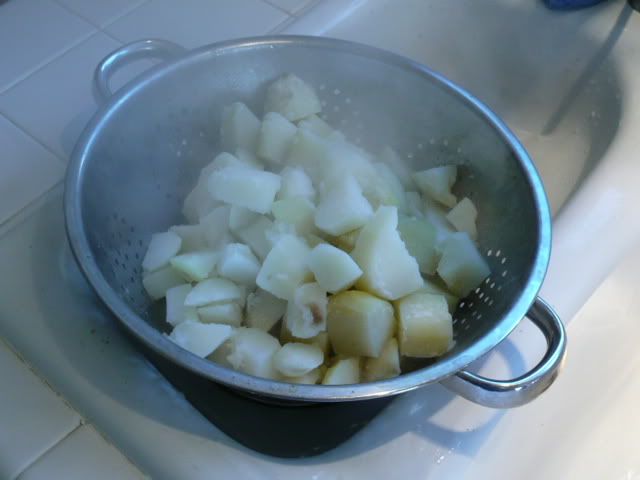
Fast forward about a half hour... I've peeled, cut up, boiled, drained...

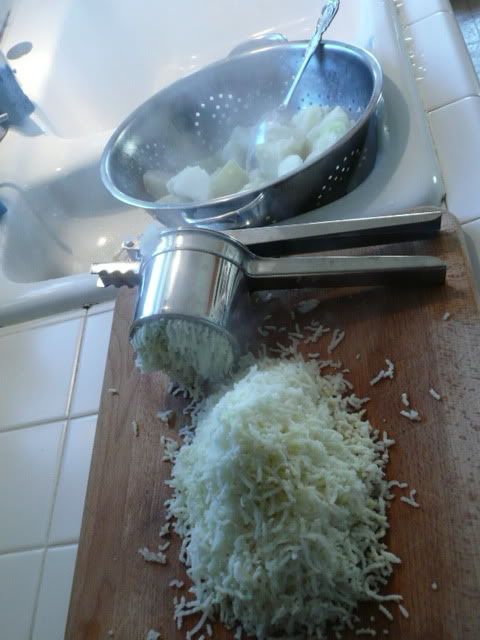
and riced the potatoes.

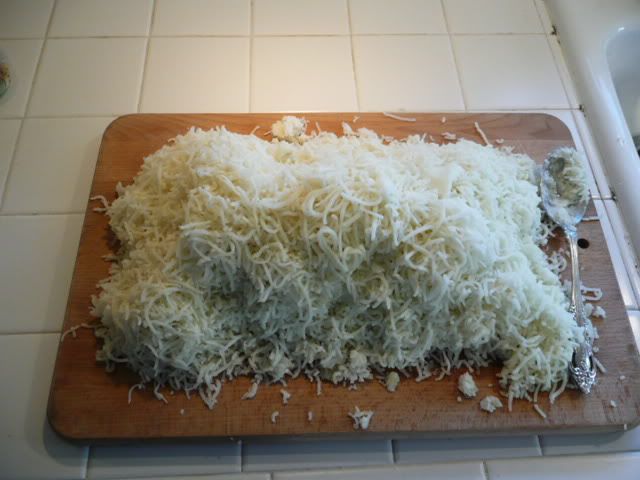
And then I realized... that's a LOT of potatoes.  To give you some scale, these tiles are 4"x4".

I ran back to the computer and checked out Mario's serving size.  Double crap: his recipe served 12 but with my additions, it would serve more like 16.  Gnocchi dough?  More like gnocchi... DOH!

I had to split the potatoes in half in order to work with them.

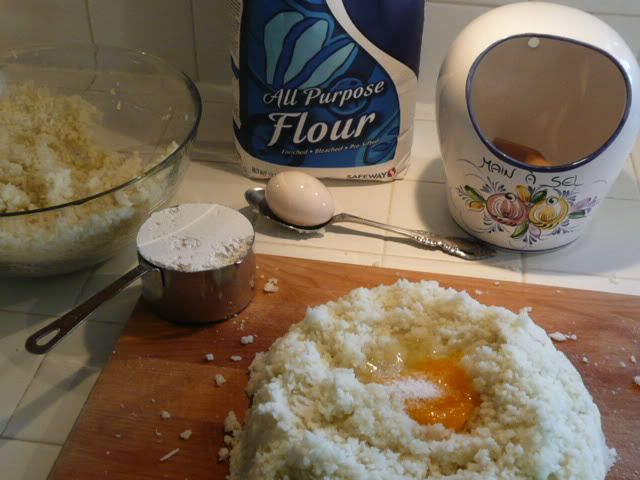
Seriously, I must have had my head up my butt that day.  The recipe clearly calls for oil, which you may notice is absent from the above photo.  I made the gnocchi without oil and they were fine but still: it was obviously amateur day in my kitchen.

By the way, that ceramic thing on the right that looks like a motorcycle helmet is a French main a sel (salt pig/cellar), which I bought in Brittany in 2000.  I love it and the memories it evokes.  When I bought it I also bought 2 kilos (nearly 5 pounds) of French grey salt for some piddly amount like $3.  Do you have or use a salt cellar?  Once you get used to it you'll never go back.

Back to the gnocchi... The mixing & kneading portion of this program is brought to you by... NOBODY!  It's too sticky and goopy and messy, so no photos.


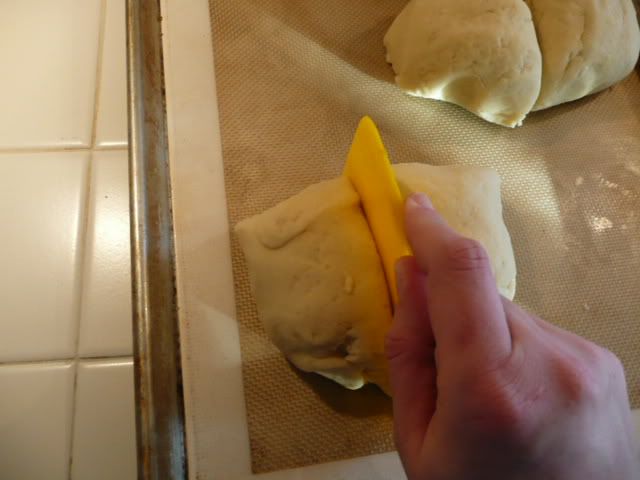
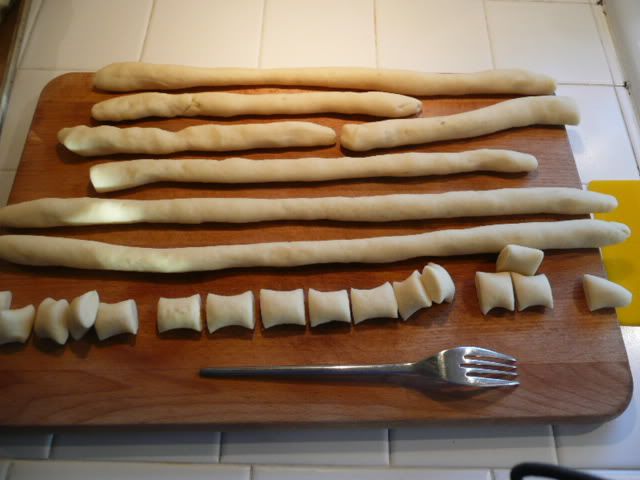
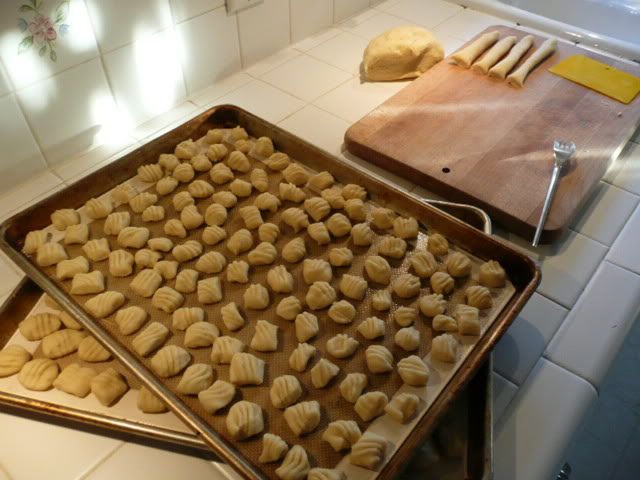
After kneading the dough I separated it into balls and used this plastic thingy to cut it into smaller sections.  I rolled them out into snakes and cut those into the final dumplings.

At this point you can leave them as-is or run them over the tines of a fork to give them the characteristic lines of gnocchi.

Here's the best video I could find of the shaping process:


Start to finish the entire process of making gnocchi took roughly 2 hours.

Did I mention this makes a lot of gnocchi? 

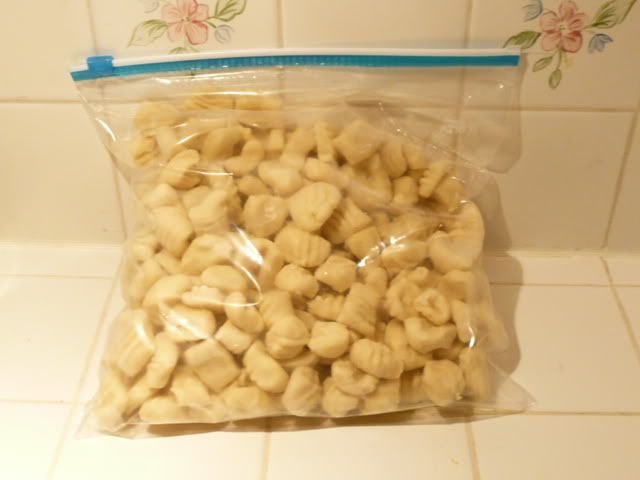
This made so many gnocchi that I placed them on silpats & froze them on cookie sheets.  After they were frozen I threw them into a zip-top bag and returned them to the freezer.  We ate gnocchi for quite a few meals, quite possibly more than 16.  These are very filling and hearty.  I think they'd last a couple of months in the freezer but no longer.

To cook these gnocchi, simply bring a large pot of water to a boil and add the desired amount.  When the gnocchi flloat - about a minute - scoop them out with a slotted spoon.  Top with your favorite pasta sauce and VOILA gnocchi!

Why did I make gnocchi? 

First, I was curious.  Could I do it?  Would they taste good? 

Second, they were cheap to make.  The potatoes were from my garden, as were the eggs.  Flour and salt are both cheap.  And since I forgot the oil they were even cheaper!  Gnocchi are kinda pricey at the store.

Finally, they provided a starch that was local.  Many of the dark days challenge dishes I've wanted to make were better with pasta.  With homemade gnocchi I could confidently say that yes, this starch was local.

I'll definitely make gnocchi again.  Like I said, we ate them for a long time and they were delicious and filling.  Next time I think I'll enlist the hubbie to help with shaping the pasta, which was the longest part of the process.

I'll post next about how we ate the gnocchi!
Saturday, January 8, 2011

Berry pancakes

Don't you love it when your significant other makes breakfast?


So do I!
G-man wanted pancakes and there was some buttermilk in the fridge that needed to get used. 

Here's the recipe he used.  If you've been reading my blog for a while, you might have seen it before.  It's our favorite pancake recipe. 

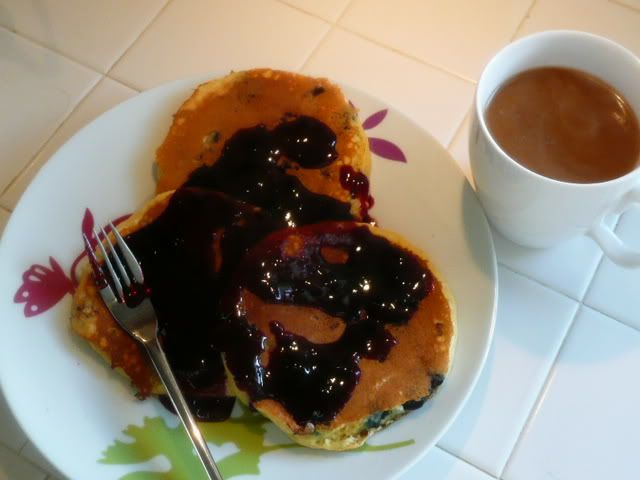
While he prepped the batter I defrosted some blueberries.  When I was a kid I didn't even know that pancakes could come without blueberries!  Even now, at 36, I think pancakes are naked without blueberries.

Nothing sexier than a man weilding a spatula.
Sorry the picture is fuzzy.  I had left the camera in the car overnight and it steamed up upon coming into the warm house. 

Or maybe I steamed up the camera watching Hubbie cook?

We topped off the pancakes with the boysenberry syrup I made last fall.

Add a cup of coffee and life is good.  Does Starbucks count as local if their HQ is just 30 miles from my house?  Yeah... I didn't think so.

Ingredient breadk-down
LOCAL: all dairy products, berries, syrup, egg
NOT LOCAL: flour, sugar, baking powder & soda, oil, coffee

Thursday, January 6, 2011

Julia Child's Ratatouille

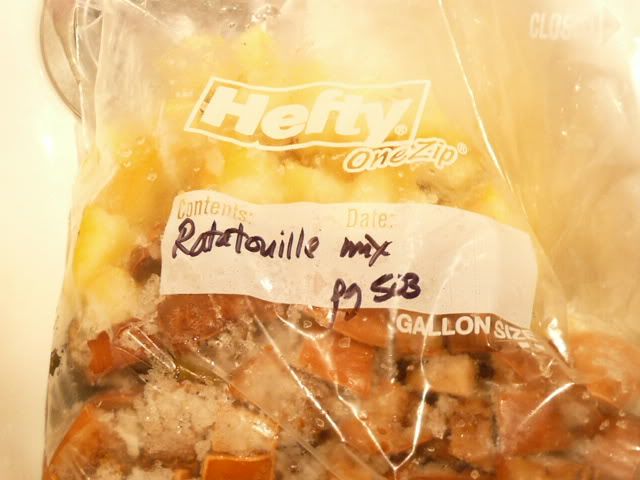
Last summer I bought a butt load of eggplants.  I chopped them up with my bumper crop of yellow squash and froze 3 bags like this one.  Notice that it says "pg 503" ?

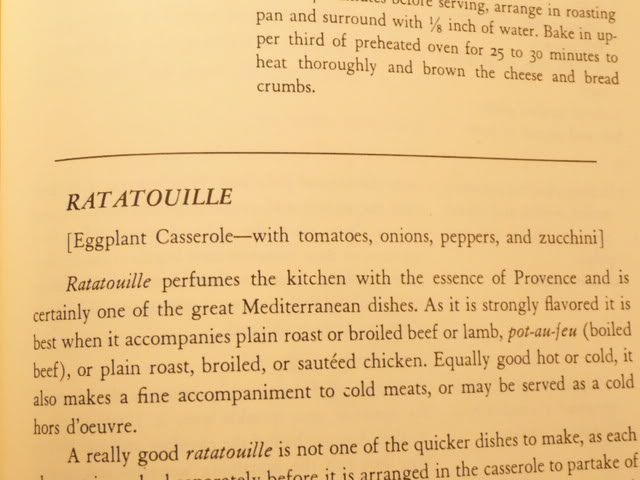
This is page 503:

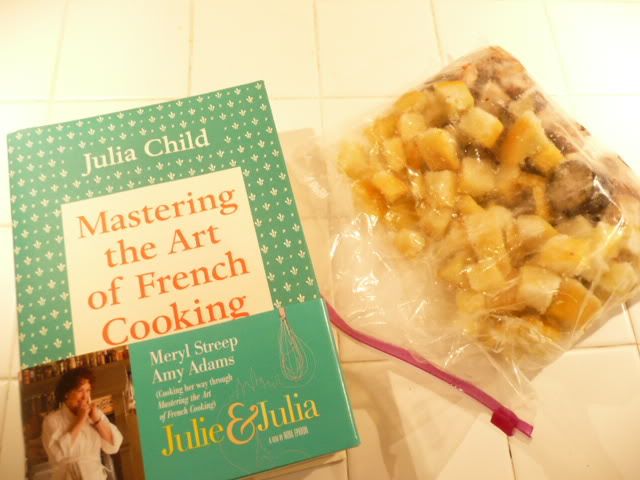
From this famous book:

I was fortunate enough to live in France for 10 months, 8 of that spent with a French family who adopted me.  The matriarch of the family, Marie-Claude, is a warm, generous, and kind person who is still a close friend.  M-C taught me many of the things I know about cooking, including how to make ratatouille.  Much of what I cook, both in technique and ingredients, comes from her influence.

Ratatouille is made from tomatoes, squash, eggplant, and bell peppers, all late summer harvest items.  It's from the south of France, which is the warm region where these things grow well.  When I bagged up the yellow squash from my yard and the farmers market eggplant last summer, it was an experiment to see if I could recapture that late summer flavor of savory vegetables in the bleak winter months of roots and hard squash.

You can download a copy of the Julia Child recipe here.

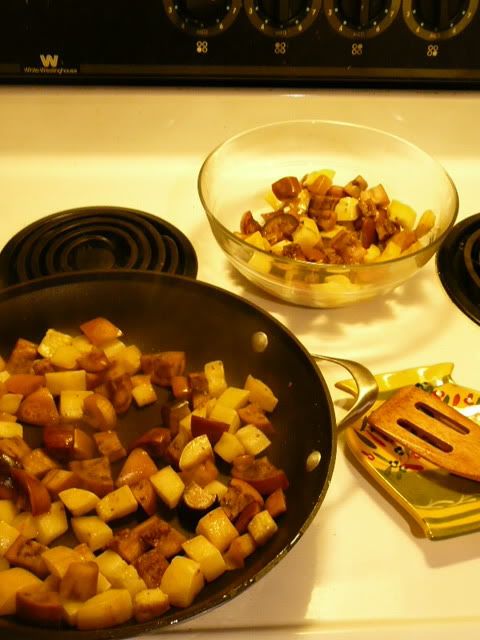
I started by cooking the eggplant in oil:

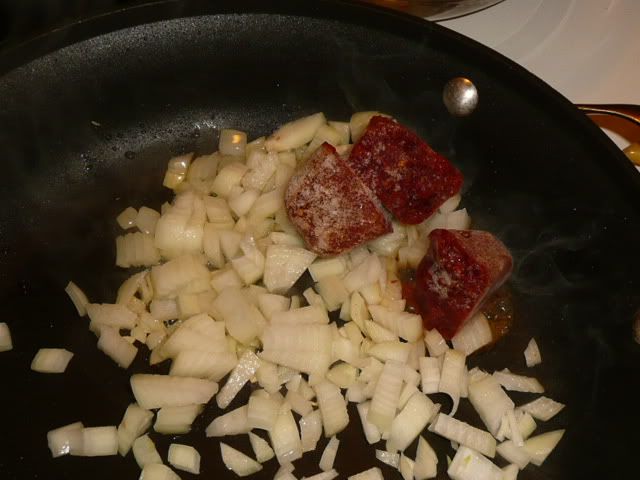
Next I cooked the onions with 3 of my fire-roasted red pepper cubes because fresh local bell peppers do not exist in Washington in January.

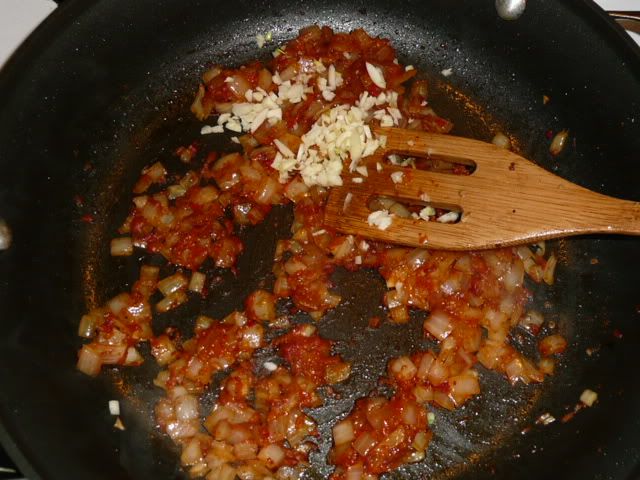
Once that was all cooked, I added the garlic.

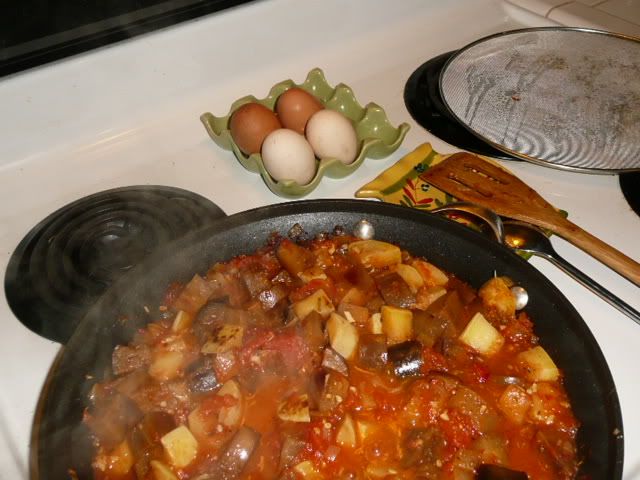
From there, I added a jar of tomatoes I had canned last summer, returned the eggplant to the pan, and seasoned it.  I could tell that Julia's ratatouille wasn't going to be as good as Marie-Claude's (sorry, Julia).  I added some herbes de Provence and red pepper flakes as well as extra salt and pepper.

I let it simmer, covered by a splatter guard, for about 20 minutes.

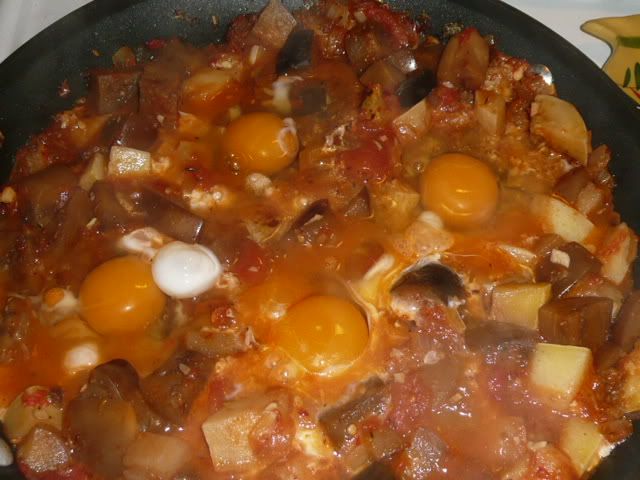
My last act was to top the ratatouille with 4 eggs and let them poach in the sauce, covered, for about 5 minutes.

Ratatouille with eggs is the only way I ever had this dish in France, and it's how I prefer it.  The slightly runny yolks add a creaminess to the ratatouille's flavor, as well as contribute protein.

Of course, I had to have some red wine with dinner!

So did I recreate a summer dish in the winter?  The answer is yes and no.  The eggplant was brown and unappealing, I think due to having been frozen and my not having drained it fully.  The yellow squash, however, was still very flavorful and I found myself digging in my bowl for just the squash.  The chickens got the eggplant and gladly ate it.  They don't get much in the way of veggies during the winter.

I still have 2 bags of the ratatouille mix in the freezer.  I'm going to try a recipe from my French Cooking cookbook, which I recently pulled from my library for the mousse au chocolat basque.  I'll let you know when I do.
Ingredient break-down:
LOCAL: All veggies and herbs, eggs, wine
NOT LOCAL: Oil, salt, pepper

Tuesday, January 4, 2011

Mousse au chocolat basque

Last week my cousin and I were talking about different kinds of foods.  To make a long story short, she confided in me that she'd never had French food.  Having lived in France and learned from a very skilled French woman how to cook a variety of things, I was stunned!  How can anyone never have had French cuisine?!? 

Worse yet, how could I not have introduced my family to a cuisine that I love?

Off we went a week later for dinner at a local French restaurant recommended by friends.  We enjoyed a good meal that ended with our sharing of a mousse au chocolat and a lemon tart.

I was disappointed by the mousse au chocolat.  It felt "puny" in my mouth and had no oompf or texture.  Yes, I know that "mousse" means "foam" but I'm used to mousses that are silken and creamy, not airy and meh.

Mousse gets its texture from the air bubbles suspended in a sweet medium.  You can use whipped cream or egg whites when making a mousse au chocolat.  Most recipes I see for mousse use whipped cream, which I don't think provides that unctuous creaminess you want from a mousse.

Here's my favorite recipe for mousse au chocolate, taken from French Cooking: Traditional recipes for the contemporary cook, the first French cookbook I ever bought.  This cookbook deserves a look because the traditional French recipes are expert at showcasing local and seasonal ingredients. 

Turns out that the amount of chocolate is variable depending upon your taste... or memory.  I didn't consult the book before delving in and used just half of the chocolate.  And I forgot the butter.  But a friend at the dinner party said, "I would sell children for this."  High praise.

Use a high quality chocolate because its flavor will be in the limelight.  The recipe scales up easily, just remember this ratio -
1 egg : 2 ounces chocolate = 2 servings

My counter has a slight bullnose on it.  I whip out the pounder thingy and whack the crap out of the chocolate while it's still in the package.  Way easier than chopping it.

I'm submitting this as a Dark Days Challenge recipe because it uses just 3 ingredients: butter, eggs, and chocolate, any 2 of which are easy to get locally.

MOUSSE AU CHOCOLAT BASQUE
This rich mousse is silken, dense, and decadent. A little goes a long way, helping to keep portion sizes small.


(Yes, the girls' eggs really are that bright orange!  Booze is all optional.)

6oz semi-sweet chocolate
1 tbsp water
1 tbsp butter
3 eggs, separated, room temperature
(optional) 2 tbsp liqueur of choice

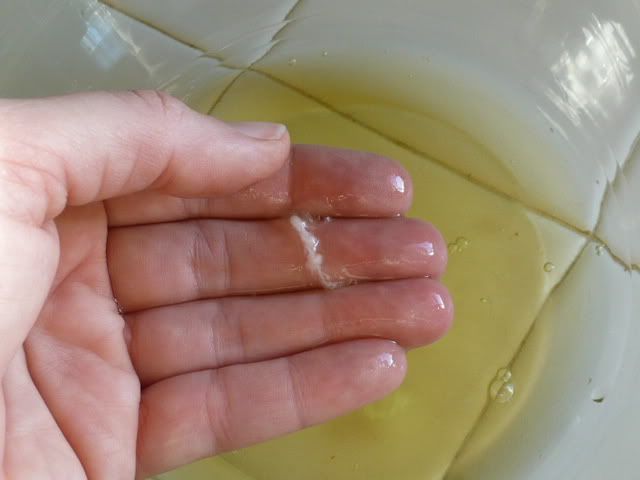
When you separate the eggs, make sure to remove the chalaza, that white squiggly thing attached to the yolk.  You don't want someone who is in the middle of a foodgasm to stop and pull a funky white thing out of their mouth.  Believe me - this happened to me once.  Moussus interruptus is bad mojo.

Break or chop the chocolate and put into a microwaveable bowl with the water.  Zap for 30 seconds, then stir well.  Zap longer if needed to melt but don't burn the chocolate.

Allow to cool slightly then add the butter, egg yolks one at a time, and the optional liqueur.

Beat the egg yolks into submission.  I had to do mine by hand because I got rid of my hand mixer last summer.  Can I count that toward my exercise regime?

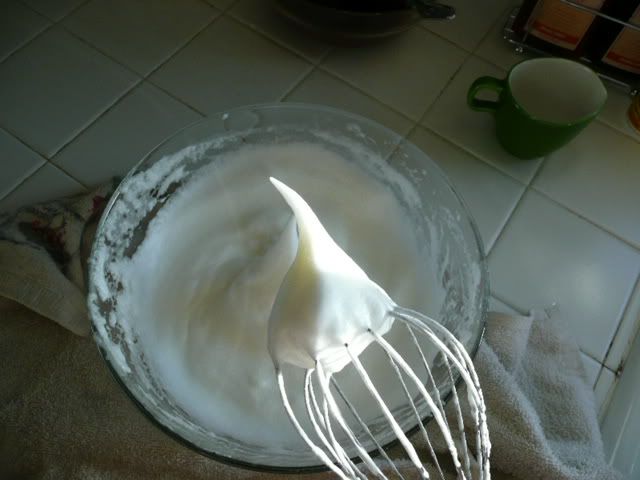
Gently... gently... fold the egg whites into the chocolate one third at a time.  Don't try to get an even color throughout: doing so will release too many of the bubbles trapped in the egg whites.


Pour the mousse into your desired vessel(s) and chill overnight.  I did one that was with Grand Marnier and another with the brandy I'd soaked my currants in for the Christmas Stollen.  The original recipe suggests rum and I've also seen people use Chartreuse, which is from the region where I lived.  On a side note, my friend is the head guide for the Chartreuse aging caves.  It's an acquired taste but good once you've acquired it!

I promise you that this will be the best chocolate mousse you've ever had.  I once made it for friends in France and they asked me for the recipe.

Sunday, January 2, 2011

Sauteed parsnips with rosemary honey


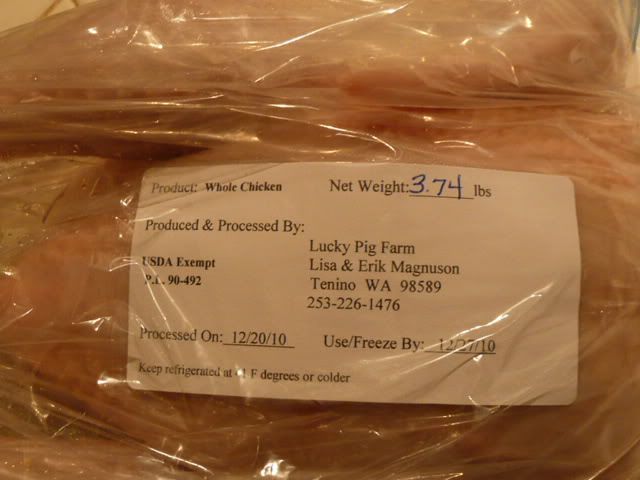
I'd been meaning to drive to Tenino, where my friend Lisa has her Lucky Pig Farm, so that I could pick up some things before Christmas.  I never made it but, luckily for me, she drives through Tacoma weekly and we were able to connect. 

There's always a voice in the back of my head whenever I'm meeting someone in a parking lot to buy a non-commercial, locally raised product like meat or honey.  That voice says, "So, ya got da stuff?"  Cracks me up.

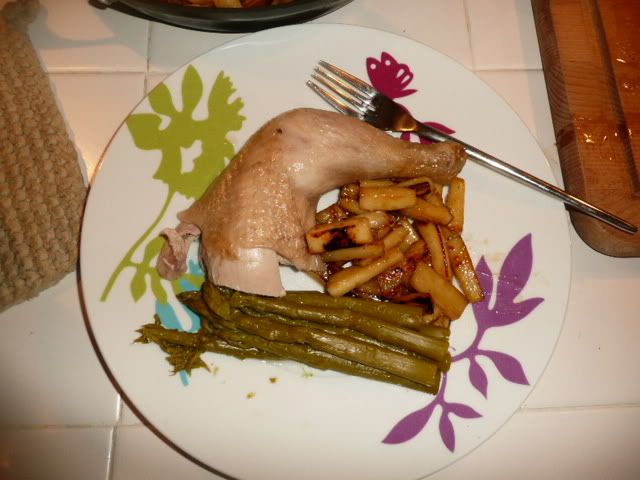
Lisa brought me a fresh chicken.  I roasted that guy up with some thyme from my yard, olive oil, salt, and pepper.

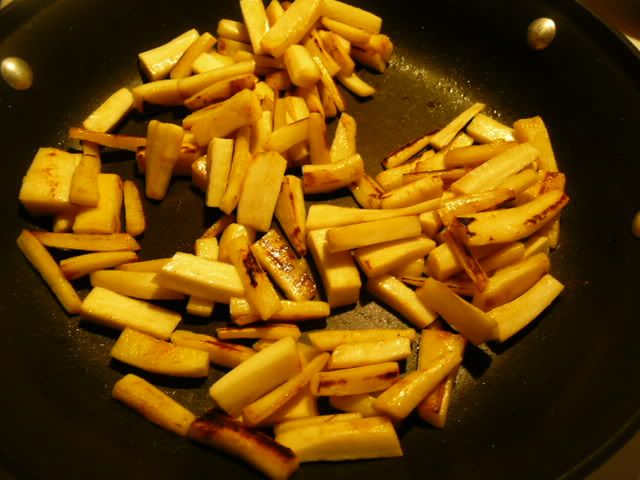
While the chicken was roasting, I made these parsnips.  I had dug them out of my garden a while back, pleasantly surprised at how big they'd gotten.  Parsnips are easily one of my favorite winter vegetable.  I love the sweetness they develop after being cooked.

SAUTEED PARSNIPS WITH ROSEMARY HONEY
adapted very slightly from epicurious.com

1 tablespoon olive oil
1 pound large parsnips, peeled, halved lengthwise, cored, cut into sticks
Coarse kosher salt
1 tablespoon butter
1 tablespoon rosemary-infused honey

Heat oil in large skillet over medium-high heat. Add parsnips.  Sprinkle with coarse kosher salt and pepper. Sauté until parsnips are beginning to brown at edges, about 12 minutes.

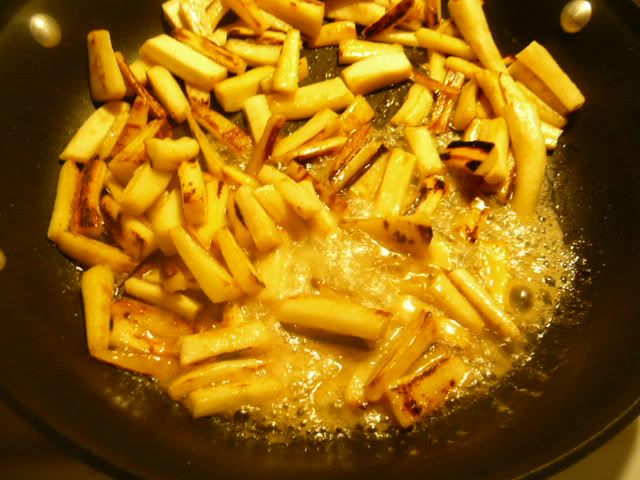
Add butter, rosemary, and honey to parsnips. Toss over medium heat until heated through and vegetables are glazed, about 5 minutes. Season to taste with more salt and pepper, if desired.

I finished off the meal with some aspargus from my pantry and voila!  A 100% local meal.

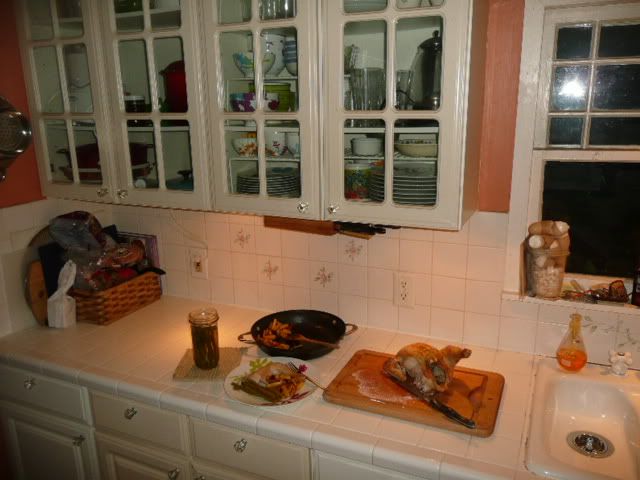
On a side note, I'm in awe of how big my kitchen looks when the counters are clear... wow.