Showing posts with label loose ends. Show all posts

Friday, October 22, 2010

Well preserved

Even though I've declared the canning season over, I'm still preserving various foods. 

Local bell peppers were dirt cheap a couple of weeks ago.  The farmers market had them 3/$1.  I bought them like crazy, then getting home with my bounty... and scratching my head about what to do with them.

After hanging onto them for longer than was probably reasonable, I decided to fire-roast them, whir them in the food processor, and freeze in ice cube trays.

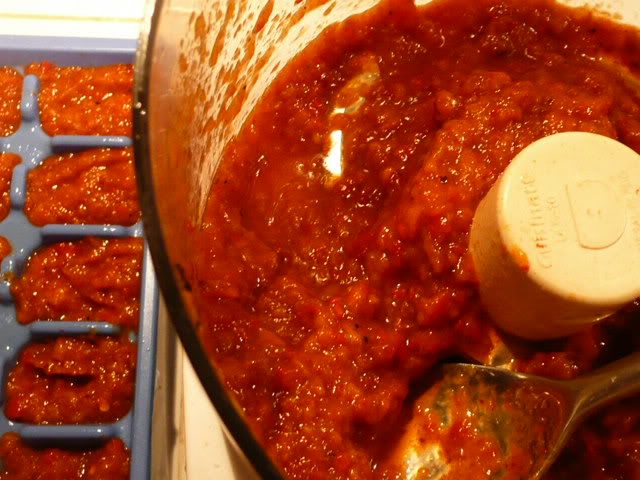
This winter I'll use these cubes of deliciousness in pasta sauce, pizza, breads, and soups.  Yum!

I also recently got a dehydrator over the summer.  It was $15 on craigslist in a nearby city called Buckley.  Unfortunately, there's no easy way to get there from here without going through stripmall hell.  I hadn't been there in years, so what the heck did I know?  It wound up being a pretty - and pretty long - drive on a late summer evening.

These little black cherry tomatoes were picked as little green orbs and ripened in a box on the floor of the dining room.  I didn't get a single ripe tomato straight from the yard.  Every single one was ripened in the house.

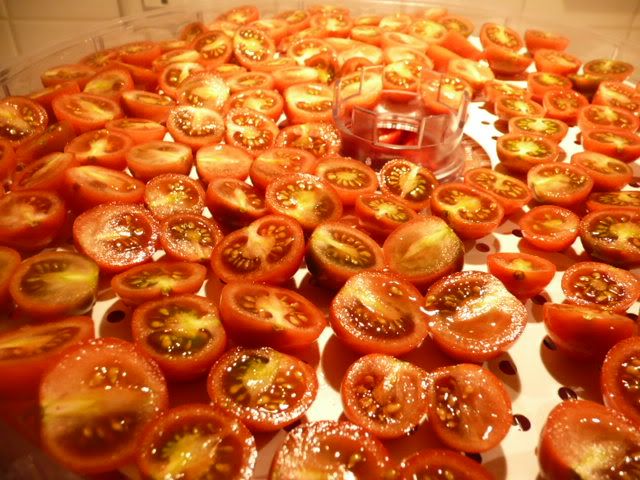
Same with these tomatoes.

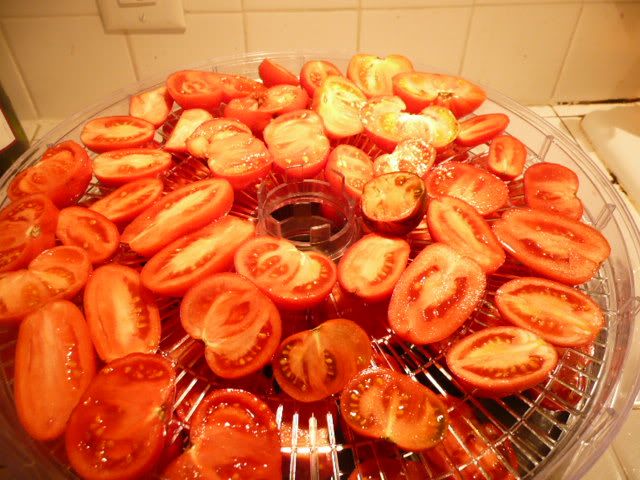
The big box of tomatoes became just 2 pint jars of shriveled burgundy chips.  They're slated for many of the same uses as the bell peppers.  I dried them to a pretty tough state to avoid problems of spoilage due to moisture.  Some went into olive oil and the rest are just in jars.  Hubbie picked up a tub of dried tomatoes and wryly said, "this jar is really expensive".

Such a romantic, that man.

Tuesday, October 19, 2010

Loose ends - Deli dill pickles

I was raised in the Episcopal Church and generally thought that guilt was in the sole proprietorship of the Catholics.  "Catholic Light" has all the same prayers, rituals, and hymns but none of that pesky guilt, right?

Wrong.

It's been weighing heavily on my mind that I haven't finished the deli dill pickles that I started waaaay back when.  OK, technically I finished them, but I haven't posted the rest of the recipe.

Here goes:

After the cukes have finished fermenting - approximately 4-6 weeks - continue to stage 2.

1. Prepare canner, jars, and lids.
2. Drain pickles, reserving brine.  Set pickles aside.  Strain brine into a large stainless steel saucepan.  Bring it to a boil over medium-high heat and boil gently for 5 minutes.

NOTE on straining - the brine will look milky and this is normal.  The milkiness comes from the natural yeast in the brine.  You could try straining it through coffee filters if this really bothers you.

3. Pack pickles into hot jars with a generous 1/2" headspace.  Ladle hot pickling liquid to cover pickles and leave 1/2" headspace.  If desired, add some hot peppers and/or garlic to the jars.  Adjust level after removing any bubbles.  Wipe rim, put on lid & ring.

4. Place jars in canner and process 15 minutes.

After being canned, the natural yeasts will settle to the bottom in a couple of weeks and look like a white layer of dust.  This is totally harmless.  I strained my brine through cloth but it didn't seem to reduce the milkiness much, if at all.

A few more notes:

I canned nearly all of my dill pickles in pint jars because while hubbie and I like dill pickles, we have a tough time eating an entire quart of them before they get slimy.

I also did a couple of half-pints of sliced dill pickle chips.  That's them on the top in the back here.  They're great for sandwiches for those times we're just too lazy to slice up some pickles.

Monday, October 18, 2010

Loose Ends - Sweet Pickles

A while back I posted the beginning of a recipe for Icicle Pickles.  Time got away from me like a water wiggler and next thing I knew it was mid-October.

I offer my humble apologies... and the rest of the icicle (sweet) pickle recipe.

After the pickles have fermented for one week, you're going to have another 5 days of work to do.  Plan out the schedule so that you end on a day when you'll have time to can.

These steps seem daunting but in all honesty, they take just a few minutes on any given day.  Hang in there!

Start with stage 1  (Recipe from "Ball Complete Book of Home Preserving")

Stage 2
Drain the cukes and discard the brine.  Rinse your crock.  Rinse cukes in cold running water and drain thoroughly.  Return to the rinsed crock.  Cover cukes with boiling water, put a cover on the crock, and let stand in a cool place for 24 hours.

Stage 3
1. Drain cukes and discard liquid.  Rinse crock.  Return cukes to crock.
2. Tie 4.5 tsp picking spice in a square of cheese cloth or tea ball.
3. In a large, stainless saucepan, combine 5c sugar and 5c white vinegar.  Bring to a boil, then pour over cukes.
4. Cover and let stand in a cool place for 24 hours.

Stage 4
Drain cukes, reserving liquid and spice bag.  Rinse crock.  Return cukes to the crock.  Boil liquid and spices bag then pour over cukes.  Cover and store 24 hours.

Stage 5
Repeat Stage 4 for 3 more days.

Stage 6
1. Prepare canning supplies.
2. Discard spice bag.  Drain cukes, reserving liquid.  Bring liquid to a boil in a large pot.
3. Pack cukes into hot jars within generous 1/2" headspace (I use rubber gloves to to this).  Ladle hot liquid into jars. leaving 1/2" headspace.  Remove air bubbles and adjust headspace if necessary.  Wipe rim, center lid on jar, finger-tighten ring.
4. Process for 10 minutes.

I always jot down notes in the margins of my canning recipes.  For these pickles I wrote:
"Made 2008.  Complicated but very good!"
"2010.  Let ferment [longer than a week] because I forgot.  Still good!"

Another thing to consider for this recipe.  I started it in a pot that was too small.  Then moved to a cast-iron pot that rusted around the rim.  I finally finished it in a stainless steel stock pot.  Save yourself the work and pick a single pot to pickle in.