Friday, October 25, 2013

Squash chili

Lately, I've been cooking with squash the way some people cook with salt.


Gene's been a good sport about it but I do recognize that he's had to hold his tongue a few times about all the pumpkin on the menu.  Thank you for your patience, honey!

In the past two weeks we've had:
  • stuffed acorn squash
  • pumpkin whoopie pies (recipe coming soon)
  • lasagna with squash
  • squash soup
  • butternut squash chili

I had been planning to make this spinach salad from Parents Need to Eat, Too but a weekend of soggy, foggy forecasts, a recipe for Cheesy Stuffed Garlic Bread, and a recent post in Feastie turned my cravings toward chili instead.
Photo: Debbie Koenig

SQUASH CHILI - Serves 6-8
I used butternut squash for this recipe.  Use whatever you have on hand. This recipe goes together quickly but needs a long simmering time.  Assemble it in the morning before work and throw it into the slow cooker.  You can buy fresh prepared butternut squash in the produce section of your grocery store to save even more time.

1 pound ground beef
1 onion, diced
1 can black beans*, drained & rinsed (16 oz/pint)
2 cups chicken broth* (16oz/pint)
1 large can stewed tomatoes* (32oz/quart)
1/2 medium butternut squash, peeled and cut into half-inch cubes
4 cloves garlic
1 TBSP chili powder
1/2 tsp cumin
1/4 tsp crushed red pepper flakes
1/4 tsp cinnamon
1/8 tsp cayenne pepper
1 T kosher salt
Fresh black pepper
*home-canned items from my pantry
  1. Brown the beef in a large stock pot.
  2. Add the onion and cook until translucent.
  3. Add the rest of the ingredients and simmer for 2-3 hours.
  4. Top with freshly ground black pepper and any other toppings that tickle your fancy: cubed avocado, sharp cheddar, green onions, cilantro, croutons.
Lunch leftovers: squash chili & mini pumpkin whoopie pies
Tonight I'm going to make pumpkin overnight oatmeal.  Do you love or hate pumpkin?

Wednesday, October 23, 2013

Not a good thing

Martha Stewart pissed off a few people last week with a condescending comment about lifestyle and food bloggers.
"Who are these bloggers? They’re not trained editors at Vogue magazine. I mean there are bloggers writing recipes that aren’t tested, that aren’t necessarily very good, or are copies of everything that really good editors have created and done. So bloggers create a kind of popularity, but they are not the experts. And we have to understand that."

This she uttered just moments after lighting up about how much she likes Twitter, and that she's probably not "too big" because others have larger followings and fiefdoms than does she.

I've been blogging for over three years now.  I'm not a "trained journalist" but I don't pretend to be, either.  Her comments lead me to believe that as long as I'm re-tweeting her thoughts, I'm an acceptable serf.  But as soon as I express my own opinions, or develop and post recipes, I'm to be put down as a member of the unwashed masses.

Count me in the "seriously annoyed" camp.

She also talked about the Home Depot wares not being "schlocky" (shoddy).  I assume by this comment that she is referring to her line of items that Hope Depot sells.

Since she's into luxury items and quality, let's examine the quality of the enameled cookware sold under the Martha Stewart name.  I've had two, identical Dutch ovens from the Martha Stewart line.  These ovens retail for around $150 at Macy's.

Last year friends of ours moved and couldn't keep their Martha Stewart Dutch oven due to space issues.  I had one that I'd gotten on a super duper clearance for $40 around the time Gene and I got married.  At just three years old it was chipped and severely discolored, whereas my girlfriend's had only been used a couple of times and looked brand new.

"Ohhh, shiny!!"  And off my three-year-old one went off to the Goodwill, the new one taking its spot.

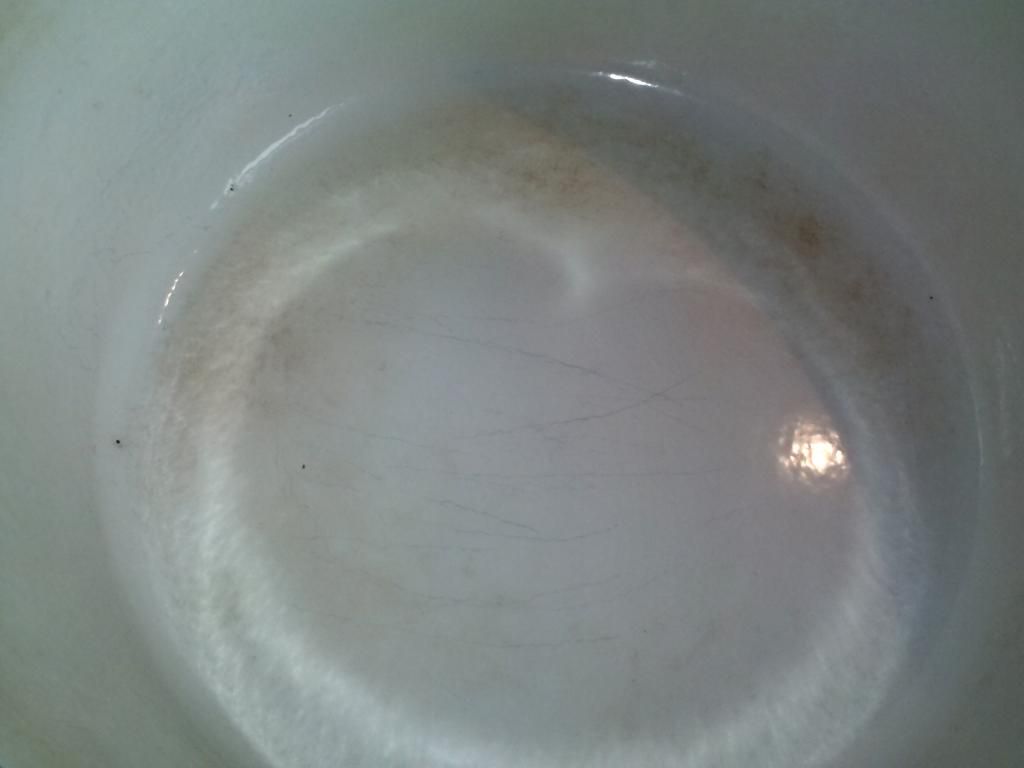
Here is the Martha Stewart one after less than a year of regular use.  See the staining on the bottom?  There is a chip inside the pot but I have no idea how that happened.  It's also stained (which you can't see here) along the liquid/fond line on the sides.  Scrubbing & soaking have not made much of a dent.

In addition to the discoloration, its handles have chipped, despite the fact that we hand-wash it fastidiously with non-scratch pads.  The three-year-old Dutch oven this one replaced was considerably more stained and chipped, hence its replacement.

Le Cousances was a French brand of enameled cookware that has since been purchased by Le Creuset.  I bought mine in 1998 for around 200 francs (USD$40) in a store called Carrefour.  I brought that bad boy back from France in my luggage in the days before strict weight limits.

I have used this Dutch oven for 15 years.  I've 
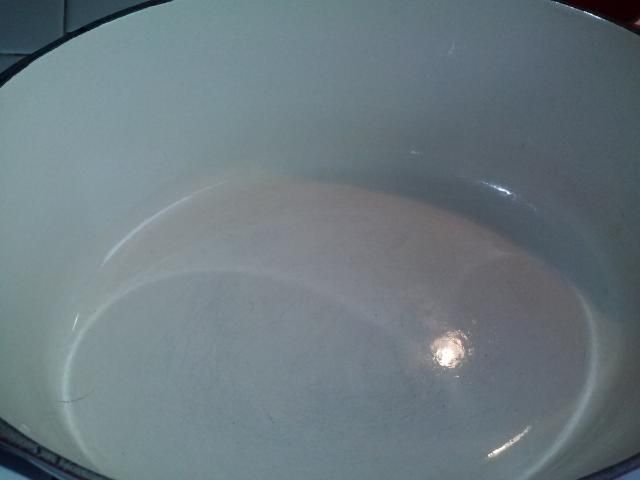
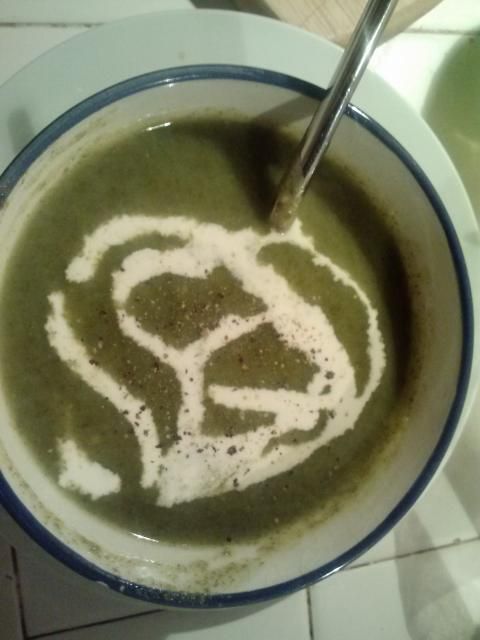
roasted chicken, made chili, and created countless meals in this cookware.  It's earned a place in my kitchen for the rest of my life.  Here's the inside of it:
Flawless.  This picture was taken after I'd used the pot to make pumpkin chili that had started with browning ground beef and ended with 3 hours of simmering on a gas flame.  Clean-up took me about 2 minutes.

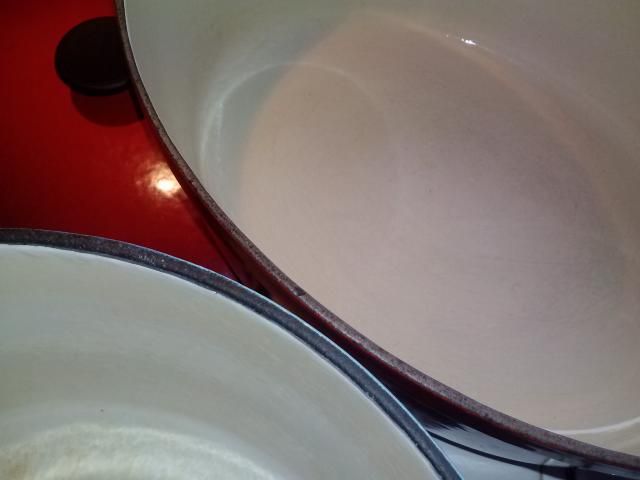
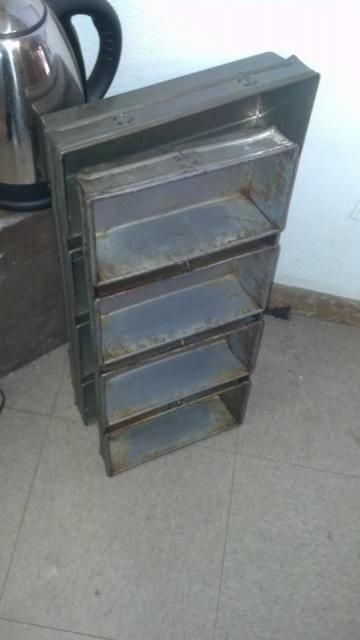
Here's a side-by-side comparison of the Dutch ovens' thickness.  The Martha Stewart one, at bottom, is considerably thicker.  Both are heavy beasts, even more so once full, but the Martha Stewart is unnecessarily difficult to manhandle due to its heft.


The undersides of the lids also show a difference in quality.  The Cousances lid has no defects in the enamel.  The MS lid, however, has places where the enamel did not adhere to the cast iron, creating opportunistic areas for rust to form.

I'll concede that the Martha Stewart Dutch oven works fine, despite its cosmetic deficiencies.  The stained areas do, however, tend to get darker with time and never fully disappear.

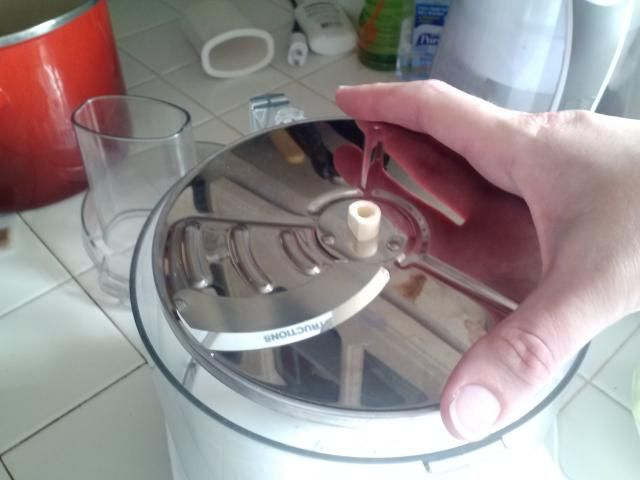
The only other Martha Stewart item in my kitchen is a rotary food mill that looks like this one.
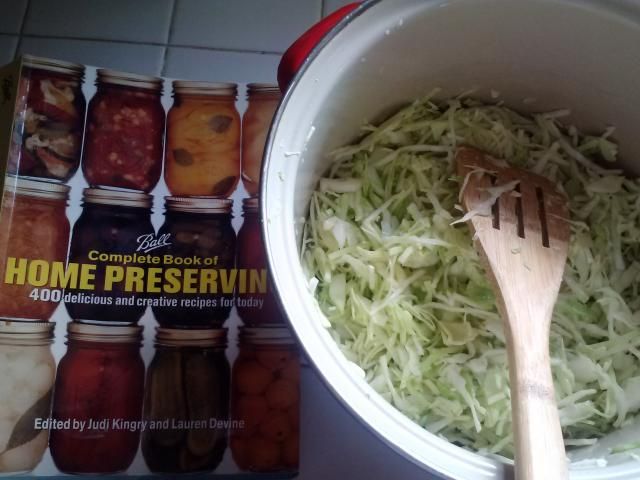
I use the food mill extensively during canning season but am looking to replace it with one that has a larger capacity and a stronger spring for pushing the food through the sieves.  The MS one takes a long time and a lot of effort but I think that's more a byproduct of it being a rotary mill, not a Martha Stewart product.

In actuality, my experience with an expensive Martha Stewart product is that it is, after all is said and done, high-priced "schlock".  The enameled cookware is not worth the money we pay for it, clearance prices or not.  A cast-iron item should last a lifetime with proper care.  I, do not equate the Martha Stewart name with quality but instead with self-serving pursuit of ego-stroking and money.  Not only will I not purchase another item that has her name on it, I won't even bother to take it for free.

The moral of this story is to buy quality, not names.  This is not a new lesson, and I'm not the first to reach this conclusion.  My next major kitchen purchase will be a Le Creuset, and the Martha Stewart oven will go off to Goodwill.

(UPDATE: a little internet research is a good thing when you're unhappy with a product...)

Sunday, October 20, 2013

How to use unwanted beer

I belong to a barter group.  At our last barter I picked up 3 bottles of some kind of beer and 1 large bottle of another.  I don't like beer, but Gene does.

Unfortunately, Gene didn't like either of these beers.  He deemed one "watery piss water" and the other was "a good, well-made beer but not my type".  He forbade me from getting  beer from people again.

So much for that.

We were stuck with four bottles of beer neither of us would drink.

With "Soup Week" well underway, it made sense to make a quick bread to accompany dinner.


Beer Bread 
From food.com

3 cups flour, sifted
3t baking soda
1t salt
1/4 sugar
12oz beer
1/4 cup butter, melted

  1. Preheat oven to 375 and grease a loaf pan.
  2. Mix dry ingredients with beer.
  3. Pour batter into the loaf pan.  Top with melted butter.
  4. Bake for 1 hour, then remove from pan and allow to cool for approximately 15 minutes.


I also made a delicious Irish stew with the big bottle of beer.  It was loosely based on this recipe.  Unfortunately, I didn't get pictures or write down my recipe changes.

What would you do with several bottles of unwanted or undrinkable beer?

Friday, October 18, 2013

Pantry staples

People know that I'm always on the look-out for free produce.  This summer I was the lucky recipient of tomatoes, bananas, a pumpkin, plums, corn, a friend's CSA share while her family was on vacation, quince (which have yet to become something), grape leaves, and probably a few other things I can't remember.

With a small household budget, I try to stretch every dollar as far as it'll go and I'm happy to accept these offerings.  They usually send me into a frenzy of preserving activity.

I was posting pictures to Facebook of something I'd made with some unexpected cast-offs when a friend queried: how to you have the things on-hand to make this stuff at a moment's notice?  I shrugged off her question and replied that I simply have a well-stocked pantry.

But her question has been in the back of my mind ever since.  What, exactly, does having a "well-stocked pantry" mean?

To me, it means always having on hand what I consider to be essentials.  When I'm running low - and by "low" I mean probably 10% of something remaining - I add it to my grocery or canning lists.  I never, ever run out of these items.  I could open my pantry right now and make nearly any baked good (unless it has unusual ingredients), a hearty soup, or a pasta dish.

  • Baking: white & whole wheat flours; granulated, confectioner's & brown sugars; leavening agents; spices & seasonings; vanilla; vegetable, olive, & spray oils; chocolate chips & cocoa powder; gelatin; corn syrup; powdered milk
  • Fresh produce: onions, garlic, potatoes, lemons, seasonal fruit & greens
  • Canning: vinegar, pickling salt, whole spices, lots of lids (bought 500 on ebay a few years ago)
  • Freezer: berries, small supply of various meats; butter; variety of vegetables
  • Home-canned items: chicken stock, tomatoes, tomato sauce, green beans, jams, salsa
  • Pantry: whole-wheat pasta, rice, refried beans, tuna fish
  • Herbs & spices: I pretty much walked up to the bulk spice section and said, "yes".
  • Dairy: milk, cheddar, eggs
  • Bread: sandwich bread, tortillas
What are your pantry essentials that I didn't list here?

Tuesday, October 8, 2013

The C-word is coming

The C-word is coming.  No, not that "C" word, another one: Christmas.

Christmas is, at the time I wrote this, just 80 days away.  Walk into any major retailer - Costco, Lowe's, Target - and the truth is unavoidable.

Because of how bills work out, I have just two paychecks that have any hope for leftover funds in the next 80 days.  My parents' and Kaelen's birthdays each fall in that time span.  My cousin is getting married on New Year's Eve and my brother's birthday is mere days into the New Year.  Money is tight.

As much as I hate to admit it, I'm thinking about holidays and gifts.  Mostly I'm trying to figure out how to manage it all on a margin-less budget.  Gene starts a new, full-time job in December (hooray for two incomes for the first time since we've been parents!).  Financially, however, that won't affect our situation much until after the holiday.  Luckily I've squirreled away a few toys for Kaelen's birthday and financial expectations are - I hope - relatively low for adult gift-giving.  I've got a trunk full of luscious yarn and, provided I get on with making things, will knit some really gorgeous gifts for loved ones.  Kaelen is going to get a pair of slippers.

If you're starting to think about holiday gifts, now is the time to make those liquors.   

Last month I started some slivovitz.  It's a deep garnet color now.  I haven't tasted any, though my boss had some of his own (he was inspired by my post about plums from him!).  He said it's pretty damn good.

Every year I think about making an orange liqueur, and every year it's too late by the time I remember around Thanksgiving.  Orange liqueur takes at least 2 months to infuse the alcohol.  Other flavored liquors can take longer depending upon the recipe you're using and the flavor you want to achieve. 

Have you seen what a bottle of Grand Marnier costs?  Yeah, it's delicious and amazing, but bottles of booze starting around $30 are out of our reach.  I made my batch of orange liqueur for about $15.  I already had the brandy from my slivovitz and had only to buy the oranges.

ORANGE LIQUEUR (aka Grand Marnier)
From food.com
Zests of 6 oranges
1/2 cup sugar
2 cups of brandy (cognac is also fine)

1. Pour boiling water over the oranges to remove the wax.  If you're using organic oranges, this is not necessary (but do wash them well).  Remove zest.

2. Mix zest, sugar, and alcohol.

3. Store in a glass bottle in a cool, dark place.  Shake whenever you think about it, or once every couple of weeks.  I'm using the original bottle the brandy came in.  As the orange zest ferments, it may cause the cork to pop off the bottle (this happens every time I had a vanilla pod to my bottle of vanilla vodka).  It's fine and not an indication that anything is wrong.

4. The orange liquor will be ready in roughly 2 months.  Strain out the solids using a fine mesh sieve first, then a coffee filter.  It will keep indefinitely.

What would do you do with Grand Marnier?  I love it in hot cocoa.  It's better than Ambien for me.

On second thought, I might not give any away after all.

Sunday, October 6, 2013

Soup week - Seafood chowder

Last month I splurged and made salmon for our fourth wedding anniversary.  I had to filet it myself, however, and it was my first attempt at butchering a fish.

I was pleased with the filets but disappointed by how much meat was left on the carcass.  Part of the problem was that I didn't have the right knife.  Rather than throw it out, I put the rest of the fish into the freezer.

Fast-forward to October.

I thawed the salmon carcass and poached it gently for about 5 minutes.  It didn't need long.  
My zombie salmon
Removing the last bits of meat was a breeze.  I got about 1 1/2 cup of meat which would have otherwise been discarded.

I wanted to make chowder with this salmon.  Ever since I was a little girl, clam chowder has been one of my favorite things to order in a restaurant.  I don't order it often anymore but dang, it's still on my top 10 list of soups.

But I didn't want to make just a salmon chowder: I wanted a clam chowder with salmon in it.

Behold, the results. 

Gene often complains that I never make things the same way twice.  Here's the recipe I developed AND documented so that I can repeat this... and make it again I shall.

Salmon & Clam Chowder
Recipe by yours truly.  Serves about 4 as a main course.

Ingredients
1 tbsp unsalted butter
1/2 medium white onion, diced
2 stalks celery, diced
1 bottle clam juice
2 cloves garlic, minced
4 medium red potatoes, cubed
3 cups chicken stock (I had an experimental batch of corn cob stock on hand, so used that)
1 tsp salt
1/4 tsp dill weed
1/4 tsp pepper
1/8 tsp thyme
1/8 tsp crushed red pepper flakes
1 cup corn (frozen or canned)
1 tsp cornstarch mixed with 1 tbsp cold water
1 can of baby clams, drained
1-2 cups of salmon, flaked (canned is OK)
1 cup cream or half-and-half

Directions
1. Melt the butter in a soup pot.  Add the onions and celery.  Cook until soft, about 5 minutes.

2. Put the clam juice, garlic, potatoes, stock, salt, dill, pepper, thyme, red pepper flakes into the stock pot and bring to a simmer.

3. Simmer gently until potatoes are soft, about 8-10 minutes.

NOTE: You don't want to allow the chowder to boil from this point onward.  The corn and clams could become chewy and the salmon dry out.

4. Add the corn and bring back to an almost simmer.

5. Stir in the cornstarch to thicken slightly (use more cornstarch for a thicker chowder)

6. Add the clams, salmon, and cream, and stir gently to incorporate.  Allow to cook at an almost simmer for 5 minutes so that flavors blend.

True to my west coast roots, I served this with sourdough rolls and freshly ground pepper.  Go ahead and offer up some oyster crackers if your tastes go that way.  I won't judge.

Friday, October 4, 2013

Soup week - Kielbasa, squash, and wild rice

This week's weather is getting better.

My office view has gone from this...

To this...

Today it's a gloomy blanket of grey drizzle across that same view.  Sigh.

But, that same weather is what inspired this, the second in a series of posts on soup.  The first post was the green potage on the left.  Today's focuses on that orange jewel in the middle.

Let me begin by saying that Gene does not like squash.

I, on the other hand, love it.  My dad is a New Englander.  Maybe that has something to do with it.  Forget the Thanksgiving yams with their weird marshmallow topping: hand me the butternut squash puree with butter.  I'll happily have a dinner of an acorn squash with butter and brown sugar or maple syrup.  When I was pregnant a local restaurant served chili in a cooked pumpkin bowl that you ate as you devoured the chili.  Divine.

Quite a few years ago I stumbled across Emeril Lagasse's recipe for "Smoked Sausage, Butternut Squash, and Wild Rice Soup".  Intrigued, I made it.

And guess what: Gene loves it.  In fact, he asks me to make it every winter.  The problem is Emeril's version is a pain in the ass to make, gets a ton of things dirty in the kitchen, and requires way more hands-on work than a rustic soup has any right to ask of someone.  Cube & cook & puree & saute & cook & mash...

Screw that.  We can do better than spend 3 hours on making soup.  This will still take about 2 hours from start to finish but there's considerably less hands-on time and fewer things you'll need to get dirty.

I made this recipe healthier AND dairy-free by omitting the cream.  Swap out the kielbasa for vegan sausages and add some liquid smoke to make a vegan version of this soup.  A note about the squash: I used 1 butternut, 1/2 acorn, and a quart of sugar pie pumpkin that hadn't sealed because it's what I had on hand.  To streamline this recipe even more, you can use squash puree found in the frozen section of the grocery store or cubed squash from the produce section.

Here's my version of that soup.  I halved it from the original, which makes a TON.  The corn and squash make it sweet.  The kielbasa lends it savory smokiness.  The rice provides texture and a nutty taste.  Try it and let me know what you think!
Photo: HelloLittleOne.com (because I forgot to take pictures)
Kielbasa, Squash & Rice soup  
Inspired by Emeril Lagasse's original version on foodnetwork.com 
Serves 4-6

Ingredients
1 squash, about 3 to 4 pounds, cut in half and seeded
1 tablespoon olive oil
1 teaspoon salt
1/2 teaspoon ground black pepper
7 cups chicken stock
1 1/2 cups chopped onions

3/4 pound kielbasa, cut into half-inch cubes
1 cup corn
1/2 cup wild rice


Directions
Preheat the oven to 400 degrees F.

Place the squash cut-side down on a baking sheet and roast for 45 minutes or until tender.
While the squash is cooking, coat the bottom of a soup pot with the olive oil and brown the sausage over medium-high heat until browned. Add the onions, corn, salt, and pepper. Saute for 5 minutes.  

Once tender, remove from oven and allow squash to cool until workable.  Scoop out the pulp and use a potato masher to mash the squash in a bowl.


Add the stock and the squash puree. Bring to a boil. Add the rice, reduce the heat to medium-low, cover and simmer for 20 minutes. Skim off any fat that rises to the surface.  Simmer for another 10 minutes or until the rice is done but not mushy.  Add more stock if you want a thinner soup.


Adjust the seasoning and serve.  This soup reheats beautifully.  We had it with beer bread, for which I'll post a recipe soon.


CANNING NOTE: I did not can any of my Soup Week soups.  I stored them in the fridge in canning jars for ease of finding & accessing them.  If you want to can your soups, use the National Center for Home Food Preservation website's guidelines for canning soup.  


Next soup post, my west coast and east coast roots collide in a most delicious way.


Wednesday, October 2, 2013

Soup week - Potage Vert

Last weekend we had a number of storms sweep through the Pacific Northwest.  It rained so hard that we had standing water in our backyard, a rarity.  In a matter of hours my grandparents' barometer dropped from the Y of "Stormy" (gold dial hand) to below the S (black hand).  It had been straight up earlier in the day.  I took this Sunday night around 9 p.m., just as a storm front was moving in from the south.

I took this photo from my office on Monday, the same day a tornado touched down about 20 miles away.  It was pouring when I took this.

When it's stormy I like to put on slippers, cuddle up with a book or some knitting, and have soup.  Or, if I'm at work, I put on a pair of slippers and have a cup of tea while I do something exciting... like reconcile a budget and track down paperwork.

So today marks the first of a few soup posts.

My French host mother, Marie-Claude, makes a brilliant green puree called potage.  She makes it "au pif" (by the nose), by raiding her pantry and assembling a variety of vegetables from whatever she has on hand.  My favorites were the bright green ones.

I googled recipes for it and found some potages that seemed similar to hers.  Some were in English, others in French.  They all seem to have a base of potatoes, some have apples or carrots.  Taking inspiration where it comes, I decided to deviate from the recipe path and attempt to recreate hers from 17-year-old memories.

Here's the result.  The parsnip is a hidden gem in this, giving it a mild sweetness.  I used mustard greens and feared they'd overpower everything else.  They didn't.  That said, I think I'll switch to spinach next time and add it in at the very end in order to maintain its bright color.  I used bouillon cubes because, well, there were two left in the box and I wanted it out of the cupboard.  I wouldn't use chicken stock in this recipe unless you really want to, as it can quickly become the dominant flavor in this delicate soup.

Make yours "au pif" using ingredients you have on hand.  It's essentially a vegetable puree with greens.  If you have a pressure cooker, pull it out for even faster cooking times.


Un hommage en potage
5 cups water
3 large potatoes (~1 pound), peeled and diced
1 large parsnip, peeled and diced
1 leek, sliced thinly
2 vegetable or chicken bouillon cubes (replace water with stock if you prefer)
2 cloves of garlic
1 bunch greens of your choice, cleaned and tough stalks removed
1 tsp salt (or to taste)
1/4 tsp pepper
Optional toppings: creme fraiche, half-and-half, croutons, toasted & chopped nuts, truffle oil, chopped parsley or chives

1. Bring water to a boil with the potatoes, parsnip, leek, bouillon or stock, and garlic.  Allow to simmer gently until vegetables are tender, about 10 minutes.

2. Add the greens, salt, and pepper and cook until tender, about 7-8 minutes.

3. Puree your soup in a blender or food processor, or use an immersion blender.

4. Adjust the seasoning to your taste.

5. Finish your soup with your preferred topping and serve with a crusty bread.  Costco makes an awesome roasted garlic bread, which is what I had.

Kaelen is teething.  He's been an absolute monster at times as a result, albeit a cute one.  While I've been enjoying my soups for dinner, he's been gnawing on a frozen treat each evening to sooth his aching mouth.

CANNING NOTE: I did not can any of my Soup Week soups.  I stored them in the fridge in canning jars for ease of finding and accessing them.  If you want to can your soups, use the National Center for Home Food Preservation website's guidelines for canning soup.  The potage could easily be canned, though I'm not confident that the quality of the greens would be good after a long processing.

Next post, a sweet, savory, smokey take on squash.

Getting spicy

I stumbled across this video a little while back.  I'd forgotten about it until I fond this link stashed in this blog post I started at the same time: http://www.incrediblethings.com/food/pumpkin-spice-the-horror-movie/

I buy all my spices from the bulk bin because:
a. It's considerably cheaper than buying them bottled.
b. My grocery store's stock turns over incredibly fast, meaning they're fresh.
c. I get the amount I need.
d. Did I mention it's cheaper?

Without a good system for organizing my spices and regular upkeep, however, my spices tend to look like this.

Ugh.  I really need to get better about having the cashier tare out the jar and not using baggies at all.

There was a flurry of blog posts about making your spice storage manageable a year ago or so.  It was the hip thing to do to spend bajillions of dollars on jars and racks and labels.  I didn't want to spend a ton of money on containers.  I don't want to coat everything with blackboard paint.  I needed what was going to work for me.

Sometime last year I went out to Bed Bath & Beyond in search of a budget-friendly solution.  I picked up a ton of these jars, which I remember costing closer to $0.25 instead of the $0.99 shown on the website.  I took the cardboard store display box, too.  I cut labels for the top of every jar.  Some of the existing bottles fit into the cardboard display holder, so I just left those.

A little tidying up and my spices are again neat and easy to find.  I struggle with keeping it organized but at least tidying it up takes only minutes rather than an afternoon.

I'm completely out of my pumpkin pie spice mix, the recipe for which I found over at My Baking Addiction this time last year.  Rather than buy premade mixes, try doing it yourself.


Pumpkin Pie Spice Mix
From My Baking Addiction
3 tbsp ground cinnamon
2 tsp ground ginger
2 tsp nutmeg
1 1/2 tsp ground allspice
1 1/2 tsp ground cloves

Combine all spices in a bowl, then transfer to your container of choice.  I prefer to use a fork to mix the spices.

Monday, September 30, 2013

Canning pumpkins

It started with the PSL hoopla at Starbucks.  Next, the seasonal shelves at grocery stores were filled to overflowing with "fun size" candy.  Costco put out an impressive display of Hulk and Princess costumes.  A Some eCard meme popped into my Facebook feed, "If you say 'Pumpkin Spice Latte' in front of a mirror, a yuppie in yoga pants will appear and tell you how much she loves the fall".  Finally, the trees started to turn color, the weather crapped out, and my chickens exploded again.

It's official: fall has arrived and with it, pumpkin season.

Other people come home with unexpected purchases like shoes, candy, hot tubs (my parents got one at the fair on a whim when I was in 6th grade), or pets.  Not me.  Last weekend I succumbed to an impulse buy and picked up three sugar pie pumpkins from Sterino Farms for $1 each.  As I checked out, the teenaged cashier mumbled something about only charging me for two of them.  I recently paid somewhere in the neighborhood of $7 for 3 cans of pumpkins at Costco, so $1/pumpkin is a good deal. 

I've done this before, bringing home pumpkins with good intentions.  I always promise myself I'll can them.  Some years I have, and other years the chickens have been the willing recipients of a deliciously rotted pumpkin sometime in January.

This year I pledged to take care of the pumpkins asap.  I put them in the kitchen, where I proceeded to trip over them for a week.

Last Saturday was one of just four days Gene and I have had off together since July.  Once he and Kaelen were fed for the morning, I got to work.

Canned Pumpkin
Instructions from the National Center for Home Food Preservation

MATERIALS
pressure canner
canning jars, lids, rings, lifter
very sharp, heavy duty knife
horizontal vegetable peeler

INGREDIENTS
sugar pie pumpkins
water

INSTRUCTIONS
1. Get your pressure canner and jars ready.

2. Prepare the pumpkins: wash, cut in half, seed, and peel.  Prep tips:
  • Cut off the end of the pumpkin to give yourself a flat, stable surface while peeling.
  • I found it was easiest to peel the pumpkins going parallel to the counter.  When I went perpendicular, my knuckles hit the cutting board whenever the peeler slipped.

3. Slice the pumpkin halves like you would a loaf of bread, not in wedges.  Not only will this give you more uniform pieces but it's also safer because you're not angling the knife.

4. Cut the pumpkin slices into 1" pieces.

5. Put pumpkin pieces into a large stockpot and cover with water.  Bring to a boil and cook for 2 minutes.

6. Ladle the pumpkin into the jars, leaving 1" headspace.  Don't mash, puree, or cram the pumpkin into the jars.  Remove air bubbles and process according to the NCHFP tables found here.

My 3 pumpkins gave me 11 quarts (1 didn't seal and became soup) and 1 pint.  After leaving them on the counter for 24 hours, I washed them and put them in my canning shelves.

Based on past experience, each quart yields just over 2 cups of pumpkin mush.  Some siphoning is normal and as long as the seal is strong, the pumpkin will keep just fine.

To use the pumpkin, simply pour it out of the jar into a sieve.  The drained pumpkin cubes will be soft and easy to use the same as you would a can of pumpkin from the grocery store.  Mine will become bread and pumpkin scones (damn that Starbucks for getting rid of them!).

Need ideas for what to do with pumpkin?  Try this site.

Saturday, September 28, 2013

A lot of pumpkin bread

Last night I made my favorite pumpkin bread, using the industrial loaf pan Gene found for me this summer.  The bigger of the set will find its way to my cousin in Massachusetts this winter when I head back east for her wedding.  And yes, they do fit into the oven.

I was nervous that the loaves wouldn't cook evenly, that the outer ones would cook faster and leave me no way to get them out without making a huge mess.  To combat this the best I could, I made sure to turn the pan around at the mid-way point of the cooking time.

It turns out that I had nothing to fear.  The loaves were perfect, even cooking about minutes faster than expected.

Three of the loaves are now nestled in my freezer, waiting to be nutritious and fast breakfasts over the coming months.

I can't wait to use this loaf pan again.

This made me chuckle.


Wednesday, September 25, 2013

Respect the blade

I don't have any feeling in the pad of my right thumb and there is just one thing to blame.

Me.

I've always been careful with knives.  I keep mine sharp, I only use them for cutting food on approved surfaces, they don't go into the dishwasher, and they're stored carefully in a horizontal knife block similar to this one.
I love my under-cabinet knife block!
I was a little more cavalier with my food processor blade, however.  Oh, not this one.  I am always careful with this blade.

This is the little devil that got me.  And it was entirely my fault because this is how I tried to lift it from the bowl.
Do not attempt at home.  This is a dumb ass move.
Never, ever, EVER lift out the slicing blade with one hand.  That is exactly how I slipped and pulled my thumb right into the blade four years ago when I was making sauerkraut.  I knew immediately that it was a bad cut, clean but deep.  We rushed to Urgent Care, where the doctor decided that the best course was to glue the wound closed.

Two days later I awoke to a throbbing thumb: infection.  The doctor removed the glue and started me on antibiotics.  

Four years later I've still got a deep, thick scar in my thumb.  As often as I think about it, I roll a pen between my thumb and fingers to keep the tissue supple.  The nerves have regenerated a little, but not fully.  It feels like I have a very thick callous on my thumb.
See that half moon?  Scar tissue runs straight under it, like a semi-circle.  It sucks.
I didn't make sauerkraut again until last month.

You can bet your butt that I was extraordinarily careful.  I now treat that blade with the same respect as my knives, and handle it gingerly.

I won't be that stupid again.

Sunday, September 22, 2013

What I know about trees

My house came with an apple tree in the backyard.  It was one of the things I liked about the house. 

During my housewarming party my grandma told me that my plum tree was nearly full of ripe fruit.  My plum tree?  I didn't even know I had a plum tree!  It was planted on the side of the house where I never went because the gate was on the other side.

Over time, the house became a home.  In doing so it collected more and more occupants.  In 2003 it was just me and my two cats.  In 2005, Gene joined the ranks.  Then in 2008 we got 4 chickens, and 8 more in 2009.  2010 saw the addition of a dog and 2011 closed with a new addition taking up residence in the former office.  In the fall of 2012 we welcome a German teenager into our home for a few months and our hearts forever.

The yard also changed quite a bit during those same years.  It had been a rental to 3 young men in their early 20s prior to becoming mine.  I sifted out the gravel from the former RV parking space, threw away countless shot-gunned beer cans and cigarette butts found in the garden, put up a new cedar fence, built a chicken coop, replaced it with a larger coop, pulled out an ill-conceived raised bed, installed other raised beds, took out grass, planted grass, tested vegetable gardens in different places around the property, planted 3 more fruit trees (crab apple, dwarf apple, and dwarf pear), and witnessed the complete desecration of my backyard by the voracious, digging chickens.

A couple of summers ago Gene and I put up a new chicken run in what we now know was a vain attempt at corralling the birds and still having an attractive yard.  Keeping the area inside of the run nice was a constant struggle.  I roto-tilled and leveled the ground, then replanted it with grass.  It was a Herculean effort.  Twelve months later there was not a blade of grass to be seen, the ground was riddled with chicken-sized holes, and Rosemary still didn't have enough space to stretch her stubby legs.

In our household hierarchy, Rosemary and Kaelen take priority over the hens, despite the girls' (ever-decreasing) production of lovely eggs for our dining pleasure.  Something had to go so that the baby and dog could enjoy our backyard with a lawn, not a mud pit.

First to go were the old apple and plum trees.  The apple tree didn't produce good apples and the plum tree's location was, well, stupid.  I now suspect that it was planted by a critter rather than a person.

In deciding to get rid of the trees - a difficult decision - I realized that I have a significant deficiency of knowledge when it comes to trees: I simply don't know how to prune them to maintain their health and productivity. 

The city had free pruning classes.  I signed up and learned... nothing.  What a waste of time.

The grass is now beautiful and lush, thanks to a couple of years of chicken poop.  We neither water nor fertilize the grass anywhere on our lot.

Am I happier?  Yes, oh yes, oh yes.

This fall I want to put in more grass in the front yard.  I just can't handle the neglected, overgrown flower beds any longer.  Since we hope to move in a couple of years, it's time to start projects like this so that we're not overwhelmed by them when it comes time to put the house on the market.

Friday, September 20, 2013

Efficiency tips

I just found this post, written in August 2012.  I never posted it.  Oops.  Life has a tendency to get away from us, doesn't it?

~~~~~~~~~~~~~~~~~~~~~~~~~~~~~~
As of two nights ago, it suddenly feels like fall in Tacoma.  The nights aren't just cool, they're downright chilly.  My birthday is next week.  Marius gets here from Germany on Friday.  September begins.  Labor Day, our third anniversary, first day of public school, first day of classes at the university where I work, October 1, Halloween. Veteran's Day. Thanksgiving!  Kaelen's first birthday!  Christmas, New Year's... 2013!

Oh crap, does time ever go fast these days.

This weekend I've felt very much like the ant in Aesop's fable.  I've been busily toiling away, putting up local foods for the winter.

The freezer was already packed full to overflowing with blueberries, strawberries, raspberries, chicken, corn, and baby food.  This weekend I squirrelled away 50 pounds of tomatoes (24 quarts) and 15 pounds of green beans.  Sadly, three of the green bean jars didn't seal so they got whirred up in the food processor and turned into frozen baby food.

When I worked with MBA students, I realized that I'm what they'd call an "operations" person.  I really dig efficiency, and love finding the best, fastest way to do things.  This is great when canning large quantities because it means I've found or made up some shortcuts to make things go as quickly and easily as possible.  Here are some of those shortcuts, reserved solely for you, my dear readers.

1. Plan your work flow before you start, and set up your work space accordingly.
Though I'm right-handed, I work best right to left, and my kitchen is set up that way.  As I move through the steps of canning, I rearrange my counters so that I'm always starting items on the right and moving them through to the left.

Because I set up my kitchen to maximize my efficiency during canning, I am able to boil 5 tomatoes for 2 minutes while I peel and core the previous batch.

2. Minimum work, maximum outcome
Everyone who cans tomatoes will tell you to score an X on the bottom, to allow the skin to split when you blanch them.  I used to score through the blossom nub  - I think of it as the belly button - until recently.  Now I score the X so that the nub is only in a single section.  Why?  Because those little scars on a tomato skin effectively tack the skin to the flesh, making the skin's removal more difficult.  If the "belly button" is reserved to one section, you are less likely to have to use a knife to cut under it from each section.

3. Tools matter.
I can tomatoes with a dishwashing glove on my left hand.  It lets me:
a) deal with hot tomatoes and boiling water without getting scalded
b) gently squeeze the tomato as I drop it into the cold water, most of the time resulting in the skin coming off entirely
c) squish hot-pack tomatoes down into the jar and get a denser pack

Wednesday, September 18, 2013

We all screamed for ice cream

The end of summer brings with it my birthday.  I love having parties for my birthday, and have thrown gigantic Mexican food buffets and various BBQs.  This year, due to Gene's work schedule and Kaelen's 6:30 p.m. bedtime, I decided to do a late afternoon ice cream party on Sunday of Labor Day weekend.  Around 25 people came for the icy treats.

Two weeks ahead of the party I started making ice cream in my little Cuisinart.  It's nothing special but it gets the job done.

Sadly, I don't have any photographic evidence of my ice cream madness.  But I do have a list of the recipes I used.  All in all we had eight different kinds, including two non-dairy. 

ICE CREAMS
Mango (this was a surprising hit)
Corn (awesome with the caramel sauce, even better using leftover corn-on-the-cob)
Chocolate Peanut Butter (I've made this several times now, and it's Gene's favorite)
Raspberry (loosely based on this recipe)
Lemon Cheesecake (Add zest of 1 lemon and let it sit overnight before freezing.)
Cherry Garcia
Coconut Milk (I made half vanilla and half chocolate)

TOPPINGS
Hot fudge
Chocolate sauce (no dairy... we used the leftovers to make mochas, so I didn't mind making 2 different sauces)
Salted caramel (given to me by a friend but I like the one from the corn ice cream recipe better)
Coconut
Toasted almond slivers

Everyone had a different favorite, and there was just a little of each one left.  Overall I probably made 2 gallons of ice cream.  Most people had bowls rather than cones.  Now I have a ton of cones and no ice cream left.

Was I nuts?  Probably.  Did our friends and family exclaim many times over how much they enjoyed it?  Yup.  Would I do it again?  Maybe.  It was an interesting experiment and I had fun trying out all the types.

Monday, September 16, 2013

Roasted tomatillo salsa

Several years ago I made tomatillo salsa from the abundance of tomatillos my garden had produced.  The salsa was delicious: green, tart, tangy, salty, spicy.  I was nearing the end of my jar inventory and actually preserved some of it in quart jars. 

We went to a party that fall and I took a quart and some chips, figuring I'd make enchiladas with the leftovers.

Leftovers?  What leftovers?  That small BBQ of perhaps a dozen people hovered up every last bit of my salsa.  I swear that someone licked the jar

I haven't had a chance to make tomatillo salsa for several years.  Last September we had an infant who was very close to crawling and a German teenager at home.  The one before that I was pregnant, when handling a heavy canning kettle was overly masochistic.

But this September, Kaelen has a semi-reliable nap schedule and I have cheap sources of local produce.

Why roast the ingredients?

First, there's the Maillard reaction, basically a chemical change that occurs in the food and creates additional flavor.

Second, it's easier.  Sure, you're seeding the peppers and cutting open the tomatillos and onions, but that's about it.  You're going to let the oven and an immersion blender (or regular blender or food processor) do the heavy lifting for you.

As an aside, wear gloves or don't touch mucous membranes after handling peppers.  I washed my hands carefully then scratched my nose.  As I write this, my right nostril is burning

Let's do this!
Tomatillos are weirdly sticky after you remove the husk, even after being washed.

Roasted Tomatillo Salsa
adapted from NCHFP

12 cups (about 4.5 pounds) tomatillos, husks removed, cleaned, and cut in half
7 long green chili peppers, seeded and cut in half the long way
4 jalapenos, seeded and cut in half the long way
8 cups onions, cut in quarters
1 head garlic (I used 3 heads of turban garlic)
2 cups lemon or lime juice
2 tablespoons cumin
6 tablespoons oregano
2 tablespoons salt
2 teaspoons black pepper
1 bunch cilantro

Roast the tomatillos, peppers, and onion in the over at 425 for 15 minutes or until some of the things are starting to brown.  Place with the rest of the ingredients in a large stock pot.  Bring to a boil and simmer for 10 minutes.

Blend the salsa until smooth. 

Process per the instructions for your altitude using this guide.

My weekend's work:
1 gallon of slivovitz
13 pints of strawberry BBQ sauce
9 pints of tomatillo salsa